
Appearance
Getting started
Last reviewed: 15 July 2026 · Beat The Queue version: 2.6.0 (11 July 2026)
Set up your first event in four steps: brand the ordering site, add a location, choose the collection times, and publish a menu. Once these are complete, your account will be ready to receive online orders.
1. Set your ordering site branding
Open Settings → Branding Settings.
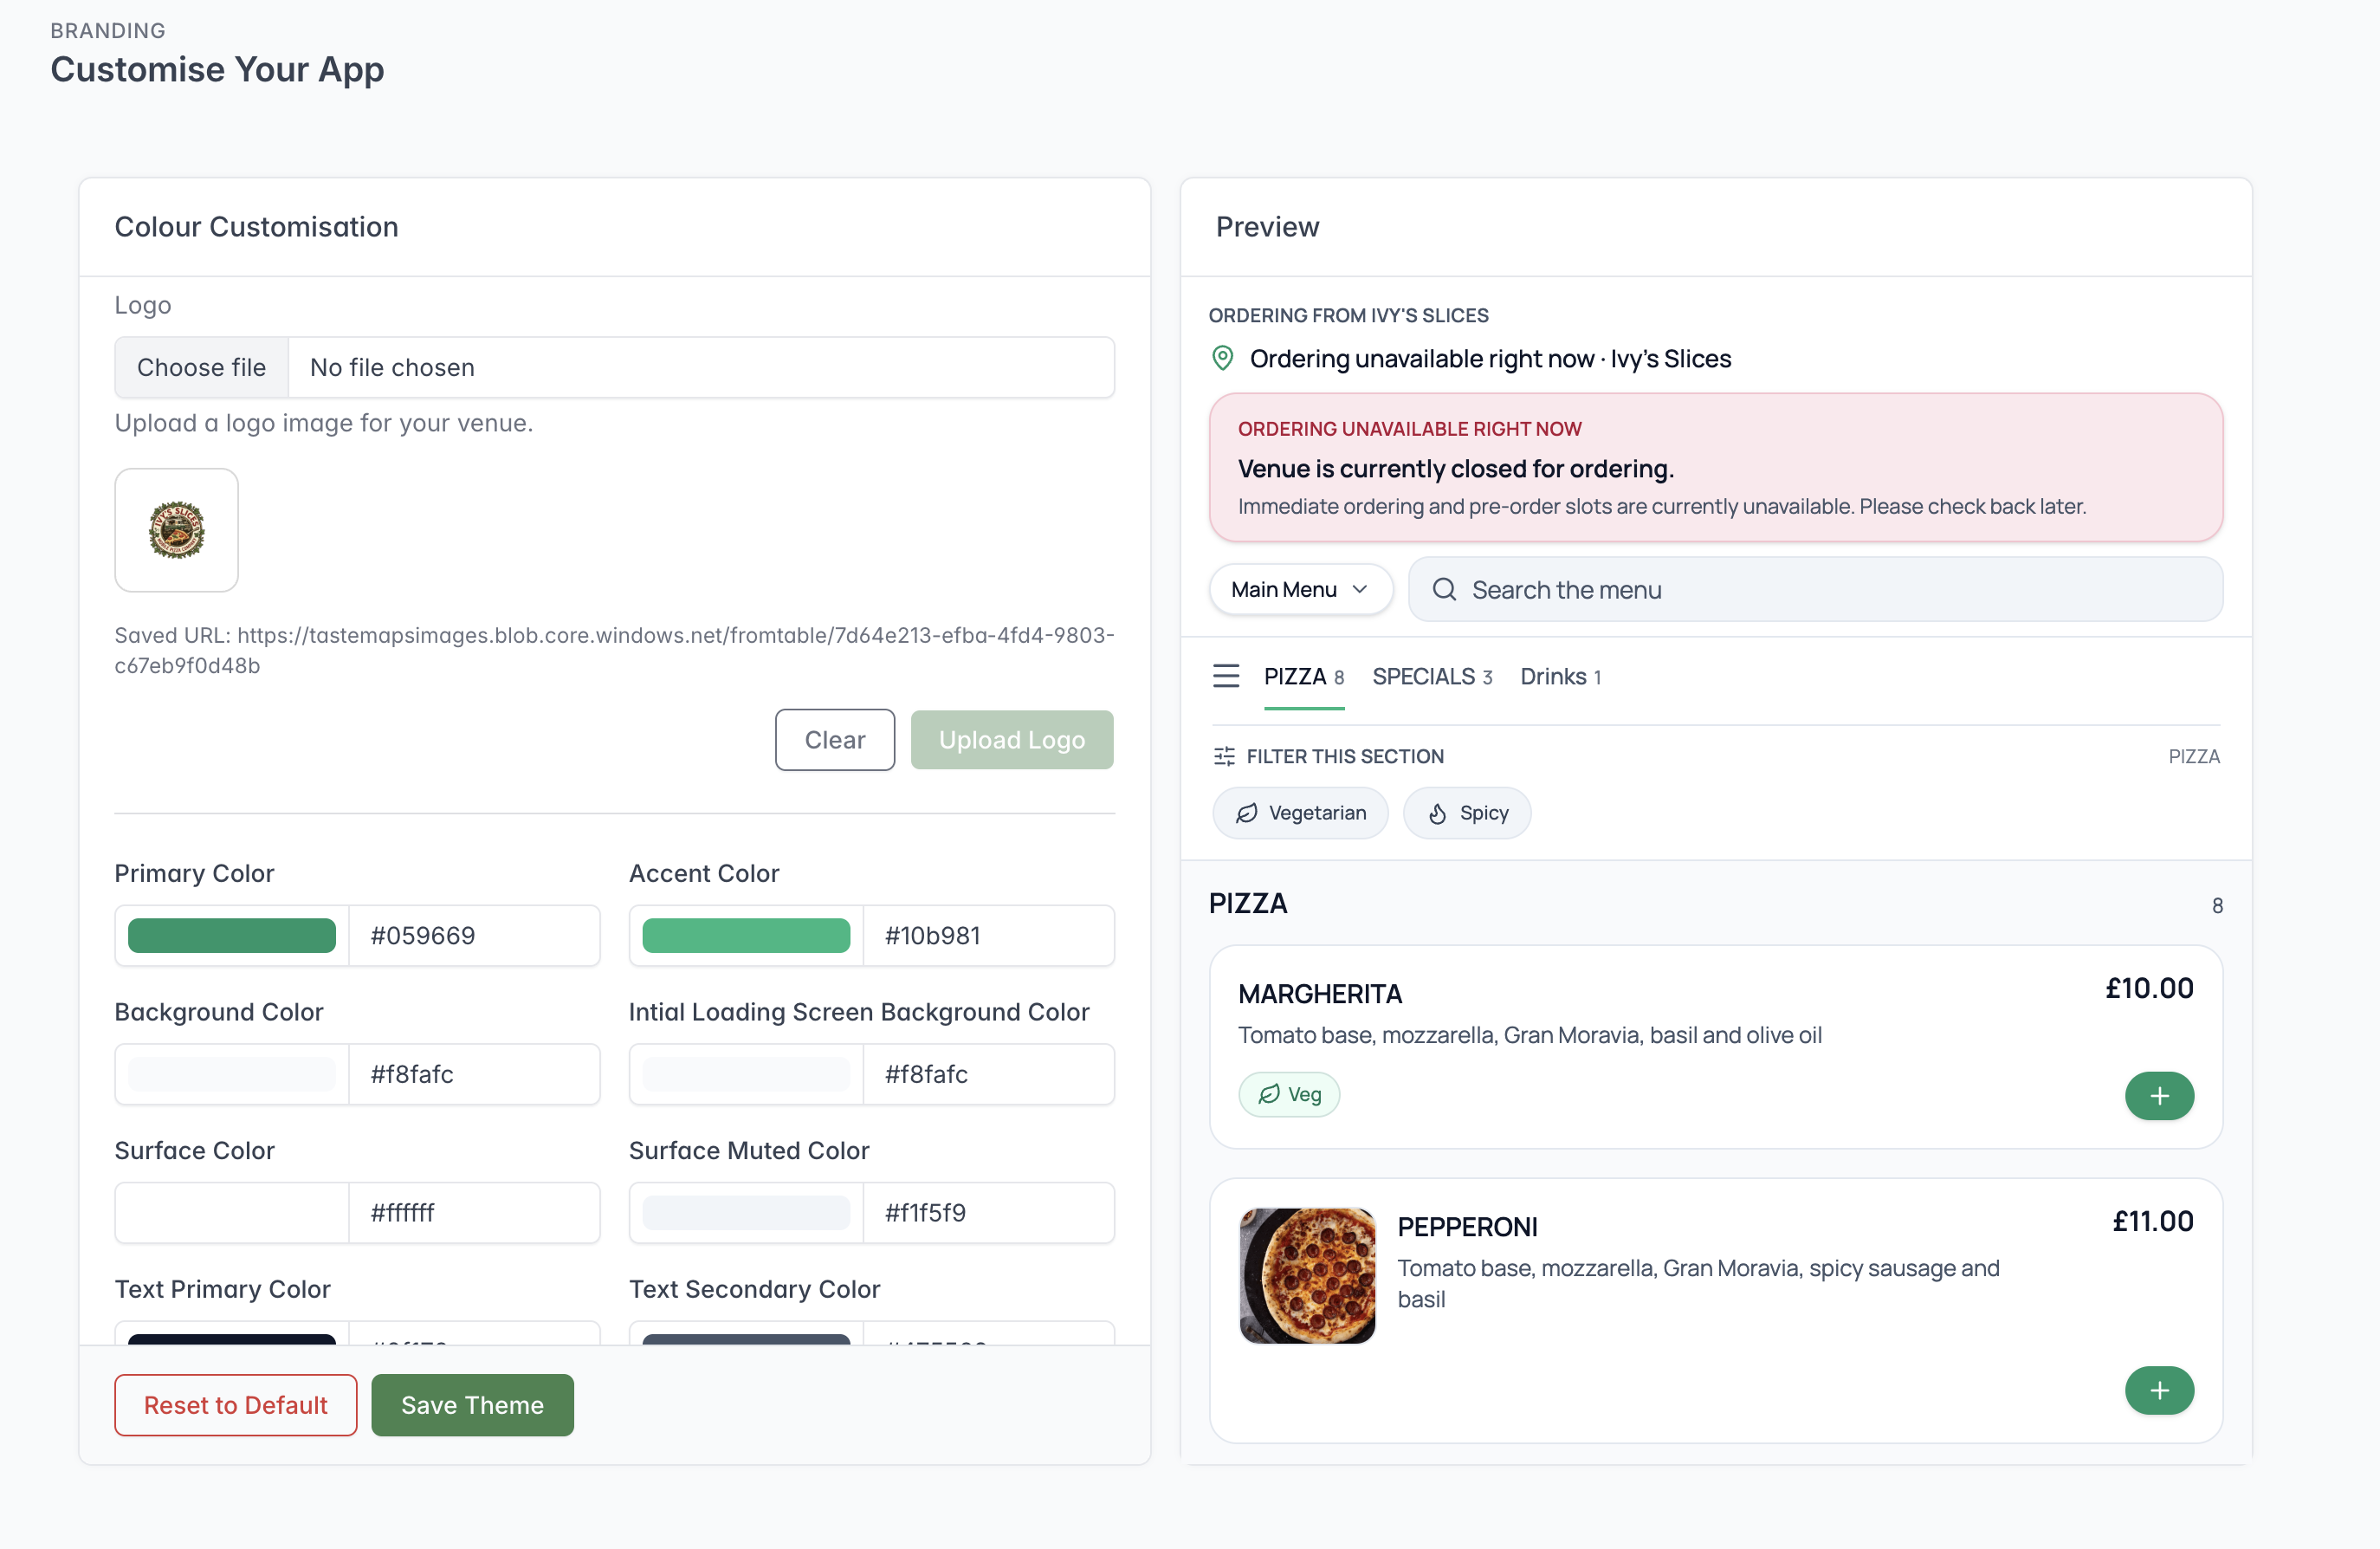
Customise the ordering site and review each change in the live preview.
- Upload your logo.
- Set the primary, accent, background, text, button, and status colours.
- Use the live preview to check text contrast, button readability, and logo cropping.
- Save your changes.
- Open the customer ordering site on a phone and confirm that the saved branding appears correctly.
You can find a complete description of every colour control in Branding Settings.
2. Add the event location
Open Booking Slots and find the location controls.
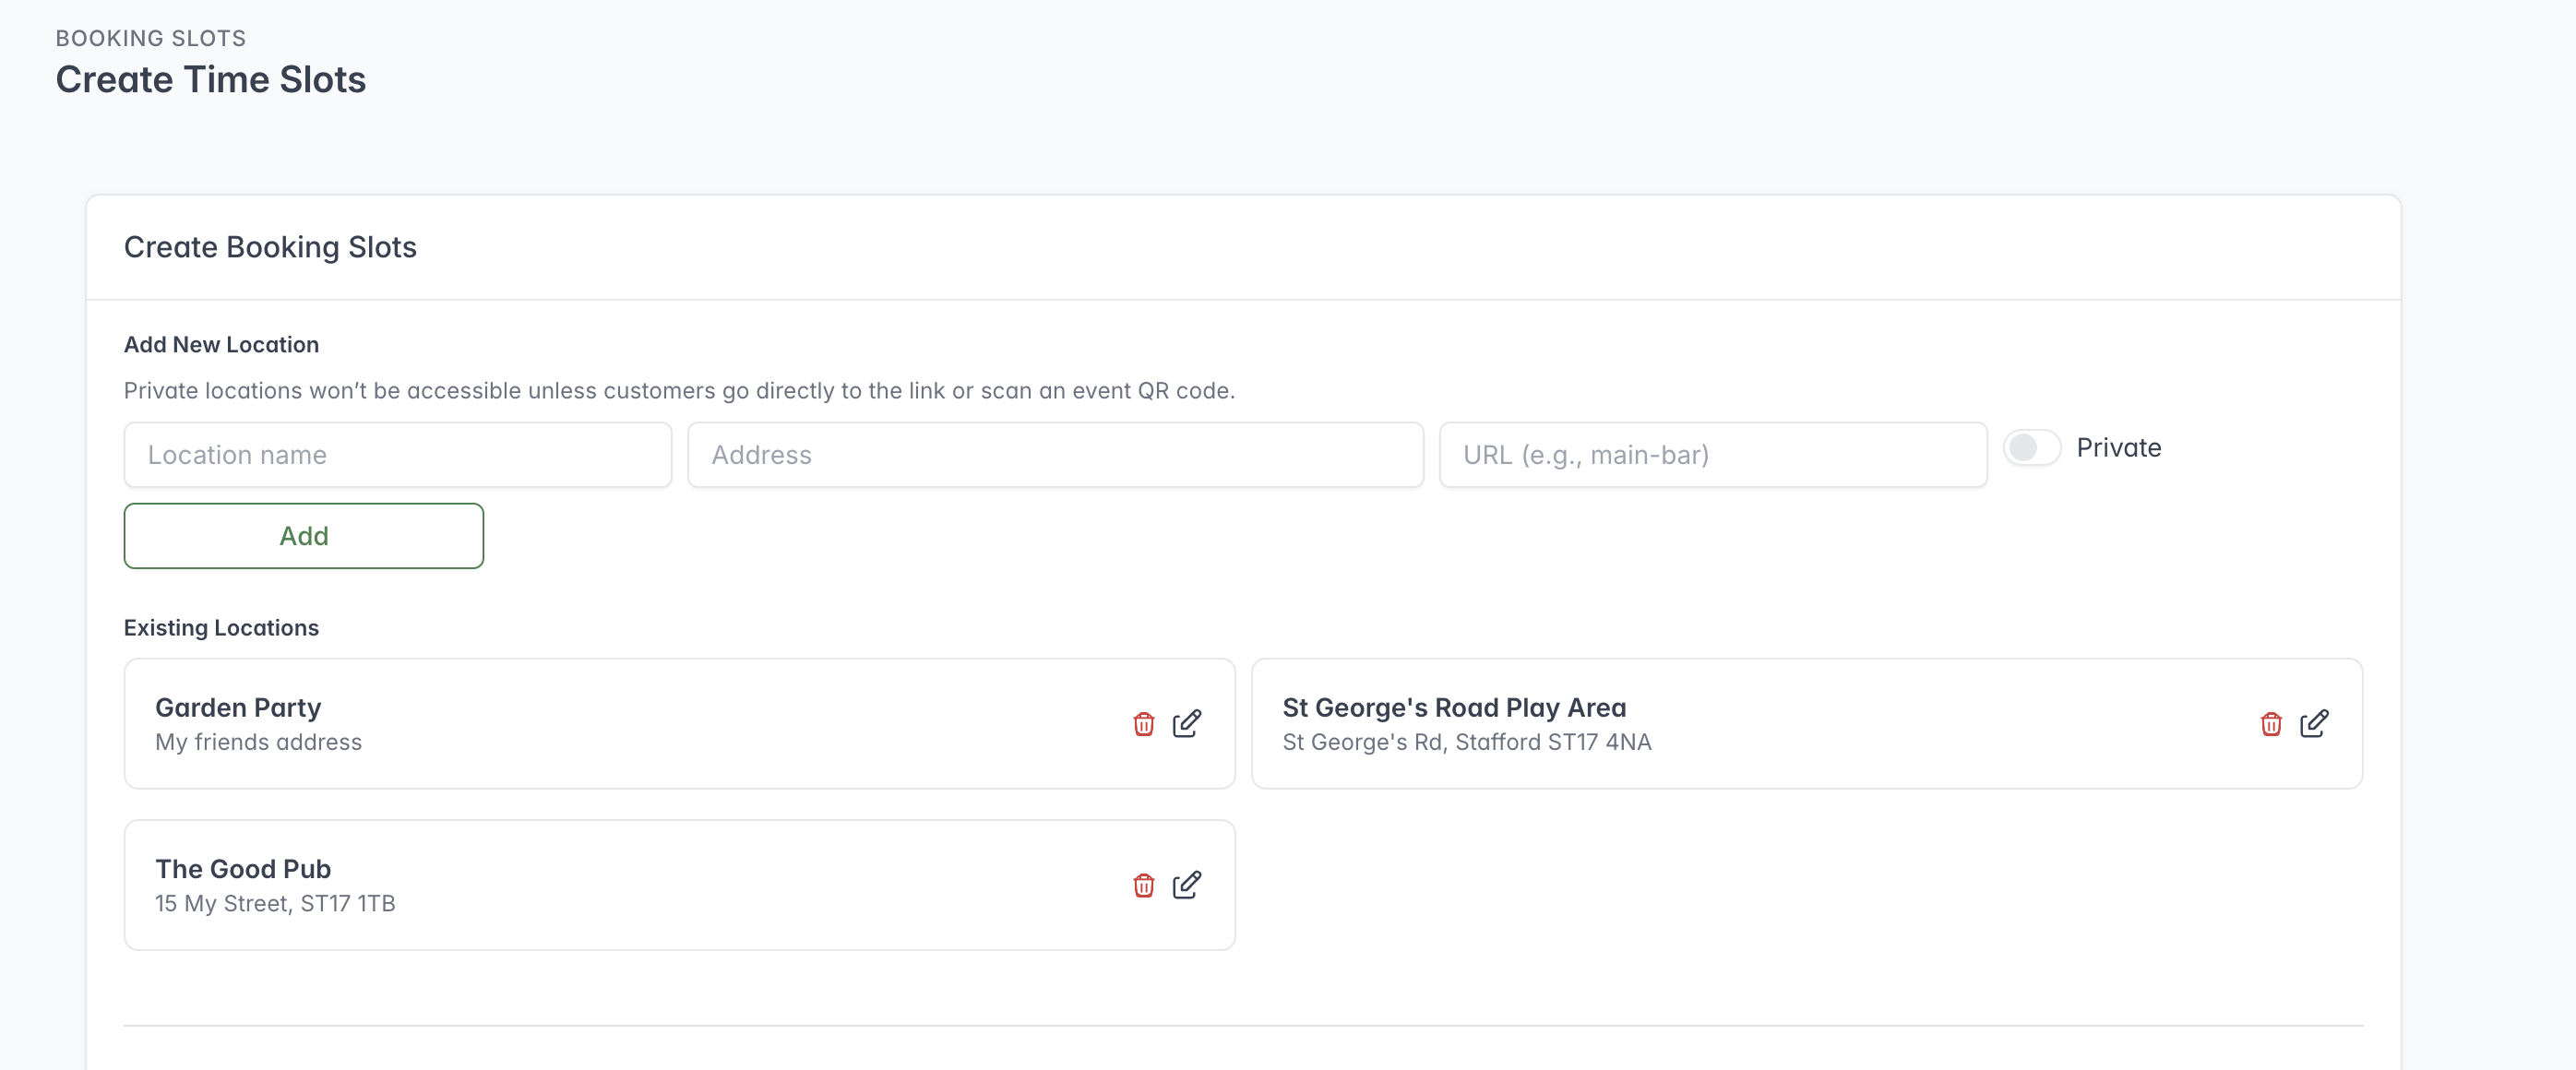
Add the location name, address, URL slug, and visibility before creating collection slots.
- Add a location and enter the customer-facing event name.
- Enter the event address.
- Choose whether the location is public or private.
- Save the location.
A private location is hidden from normal customer browsing but can still be opened through its direct link or an event QR code. See Locations for more detail.
3. Choose when customers can order
Use collection slots when customers should choose a future collection time. Use Order Now when customers should place an immediate collection order during your opening hours.
Option A: add collection slots
Open Booking Slots, select the event location, and choose the event date. Although the screen is labelled Booking Slots, this guide refers to the customer collection times as collection slots.
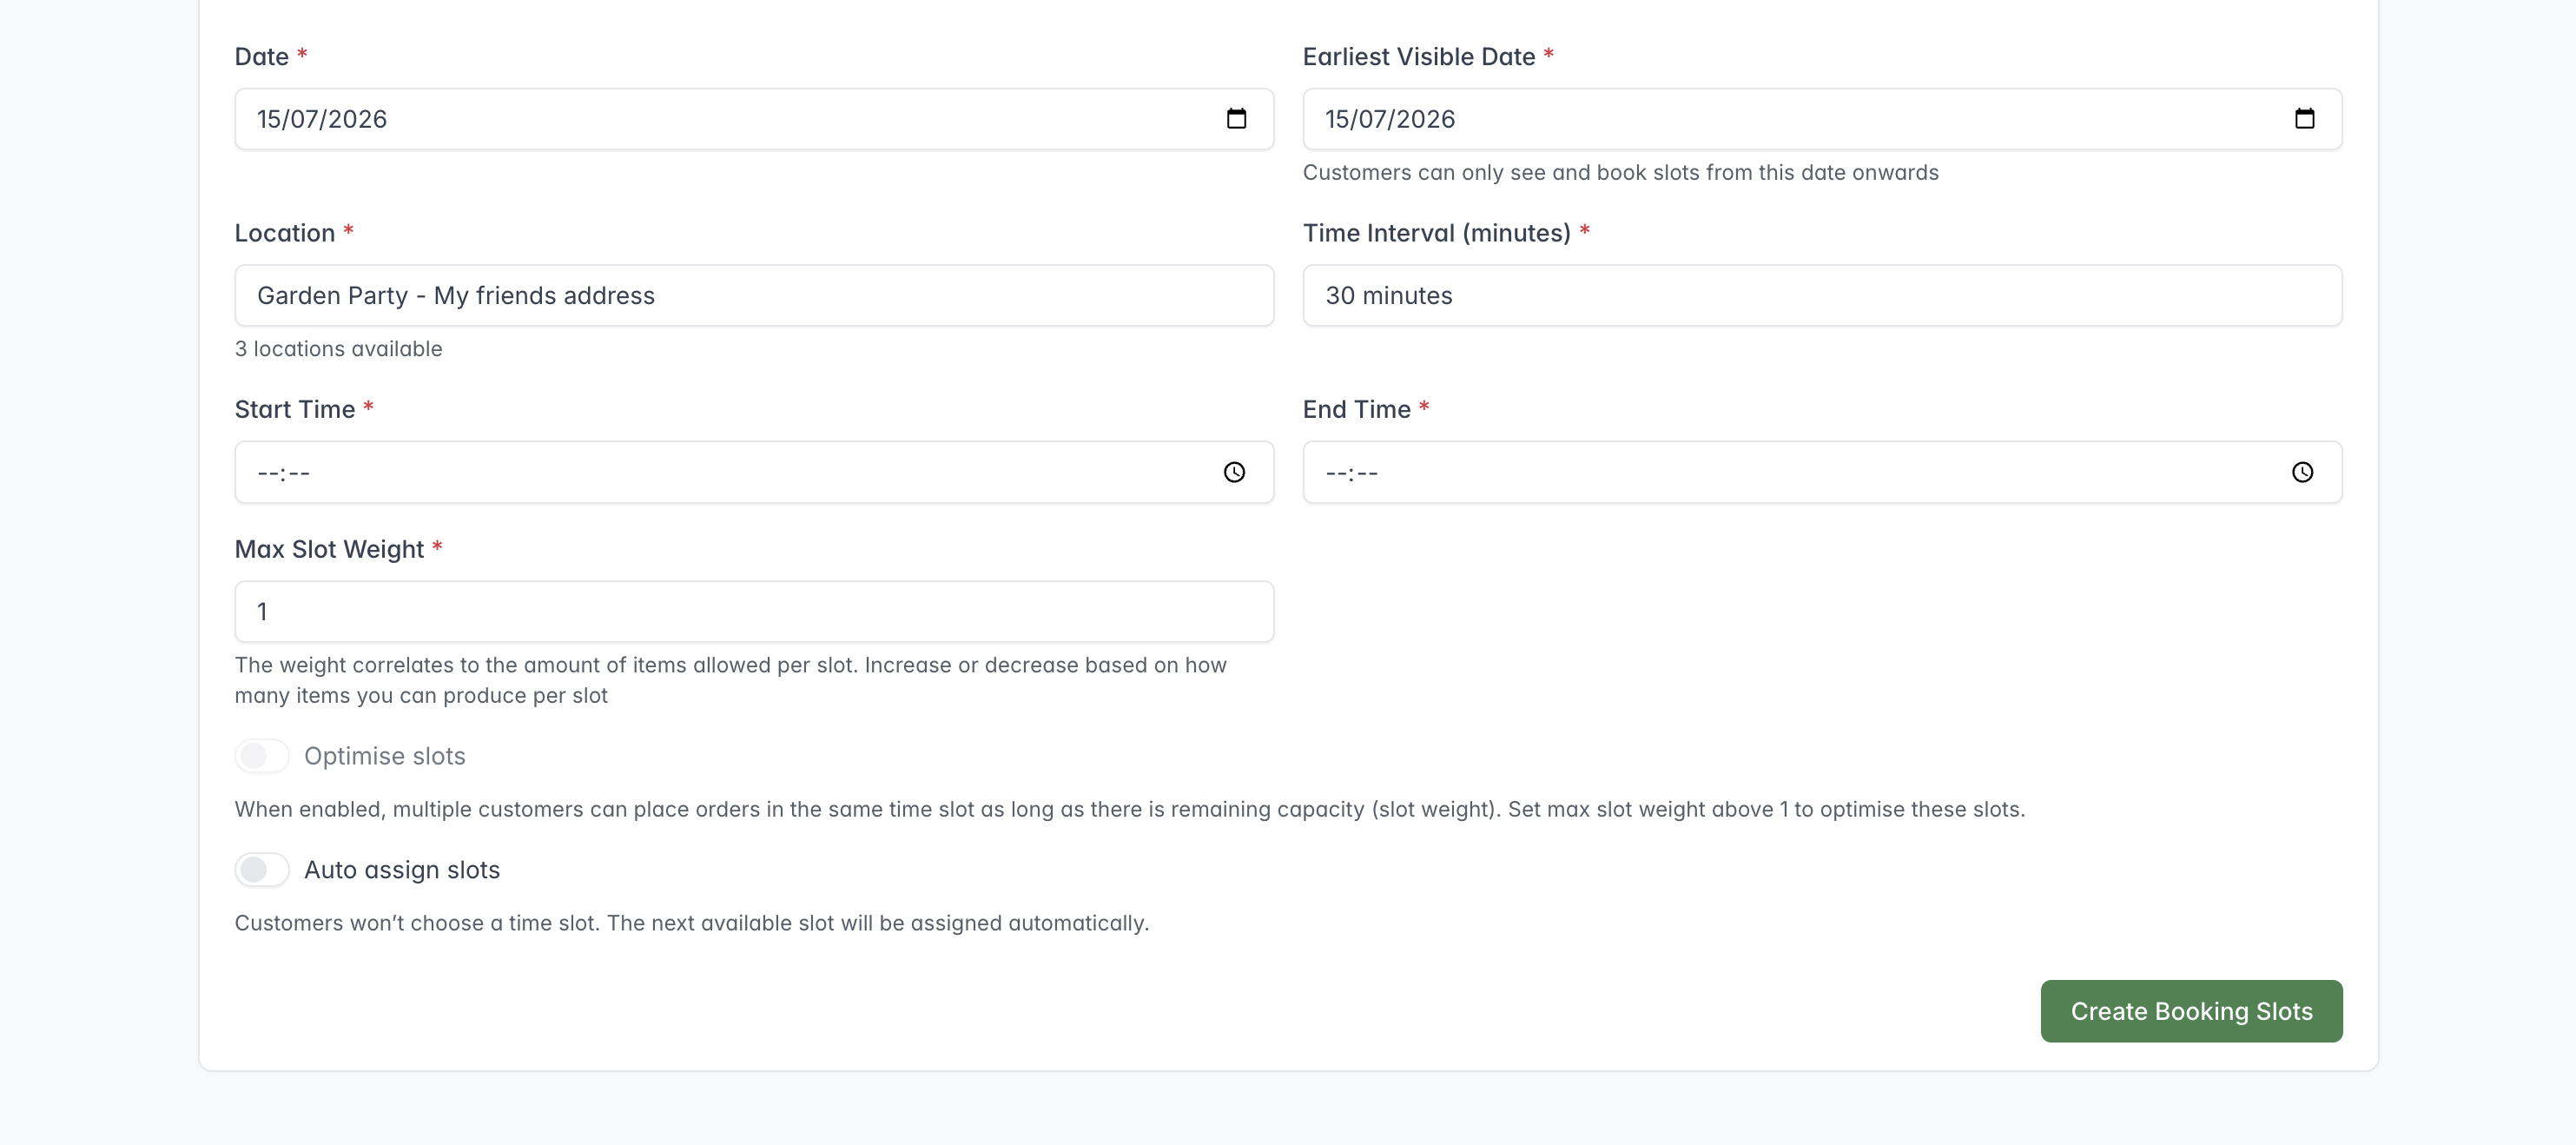
Choose the event date and location, then set the collection times, interval, and capacity.
- Enter the first and last collection times.
- Choose the interval between slots.
- Set the earliest date on which customers can see and book the slots.
- Set the maximum slot weight or capacity.
- Choose ordinary, optimised, or auto-assigned behaviour where available.
- Create the slots and review every generated time.
Collection slots use your current local time zone. If you are setting them up from a different time zone, check the generated times carefully. Learn more about collection slots and capacity.
Option B: enable Order Now
Open Settings → Venue Settings and find Charge Settings. Venue Settings is the screen name for these account-wide settings.
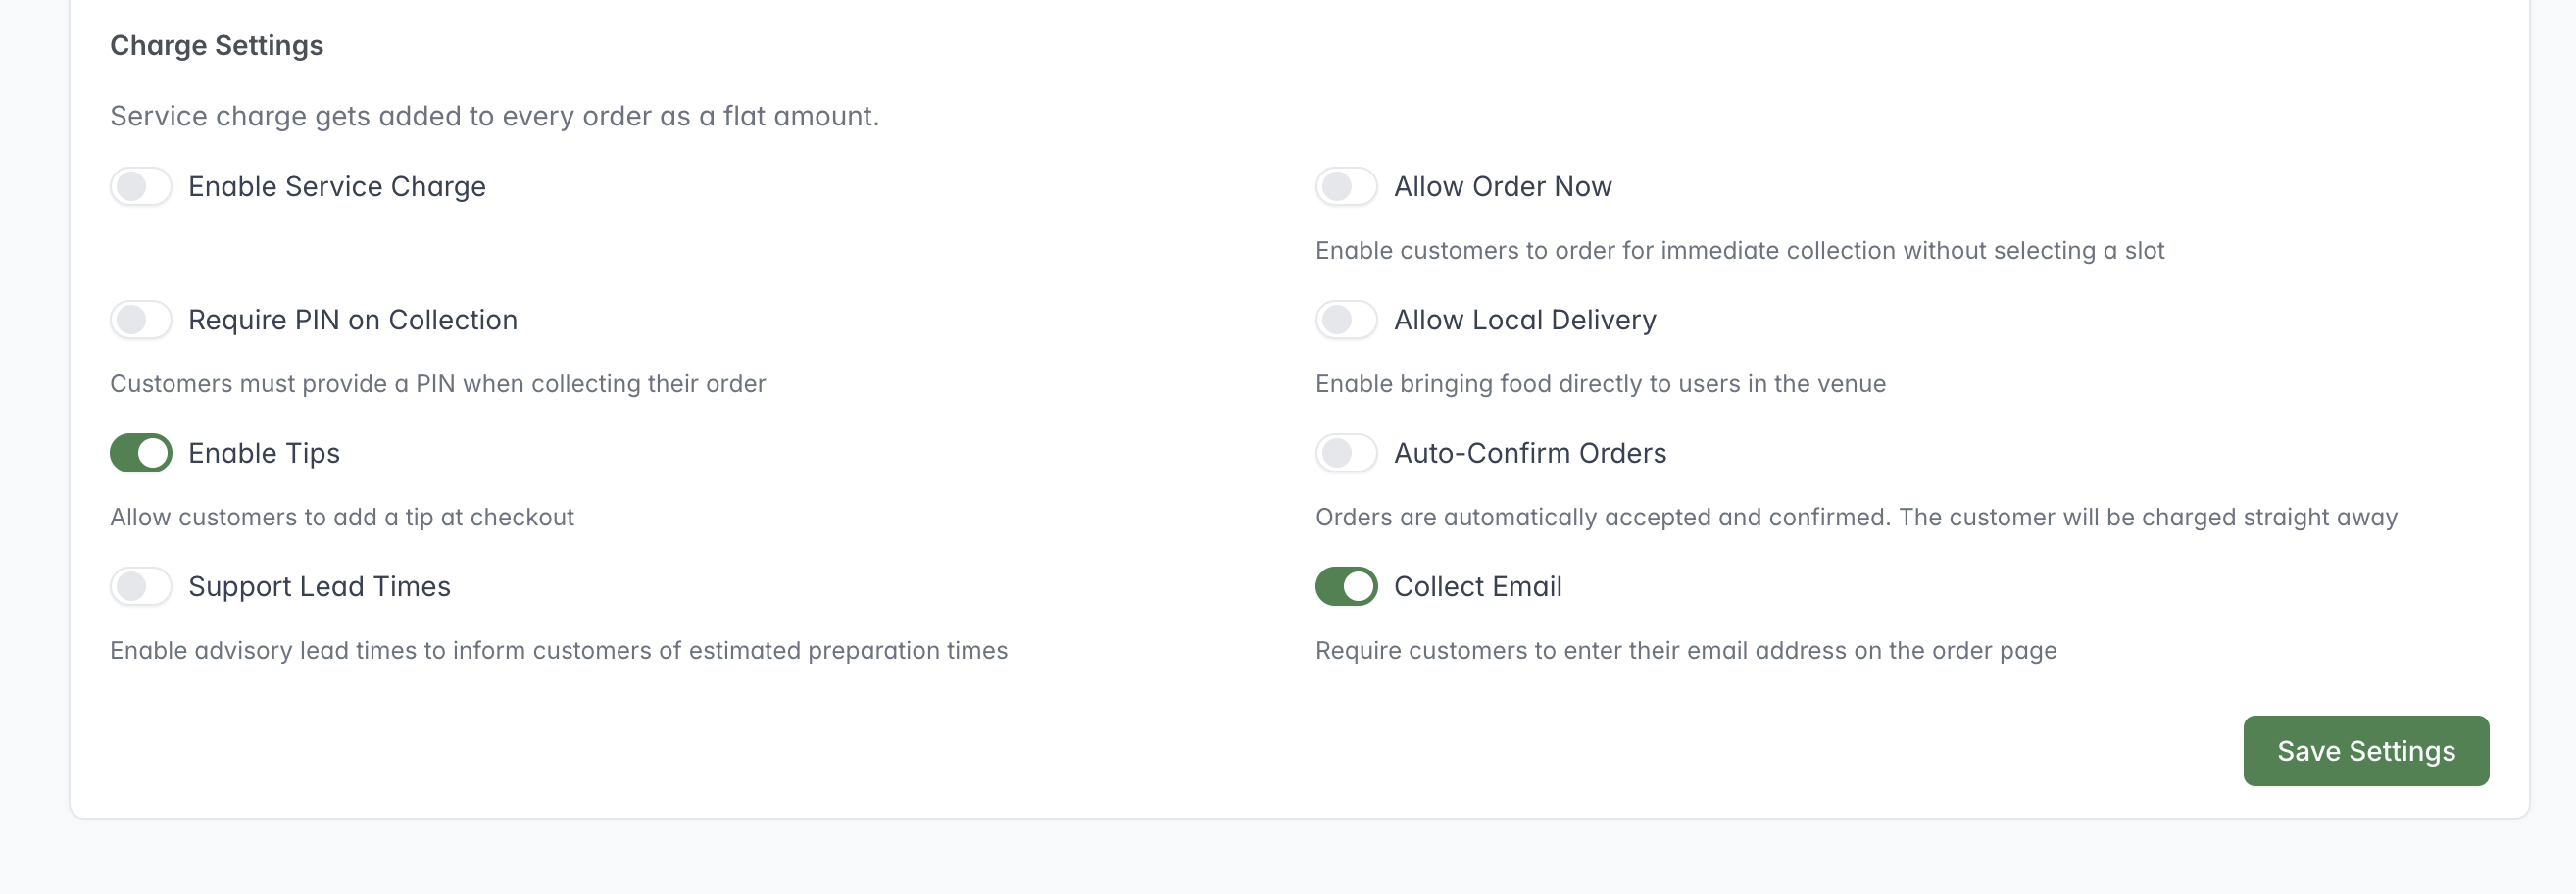
Enable Allow Order Now when customers should place immediate collection orders without choosing a collection slot.
- Enable Allow Order Now.
- Set the account’s operating days and hours to cover the event.
- Confirm that the event location’s opening days and times cover the same period.
- Save the settings.
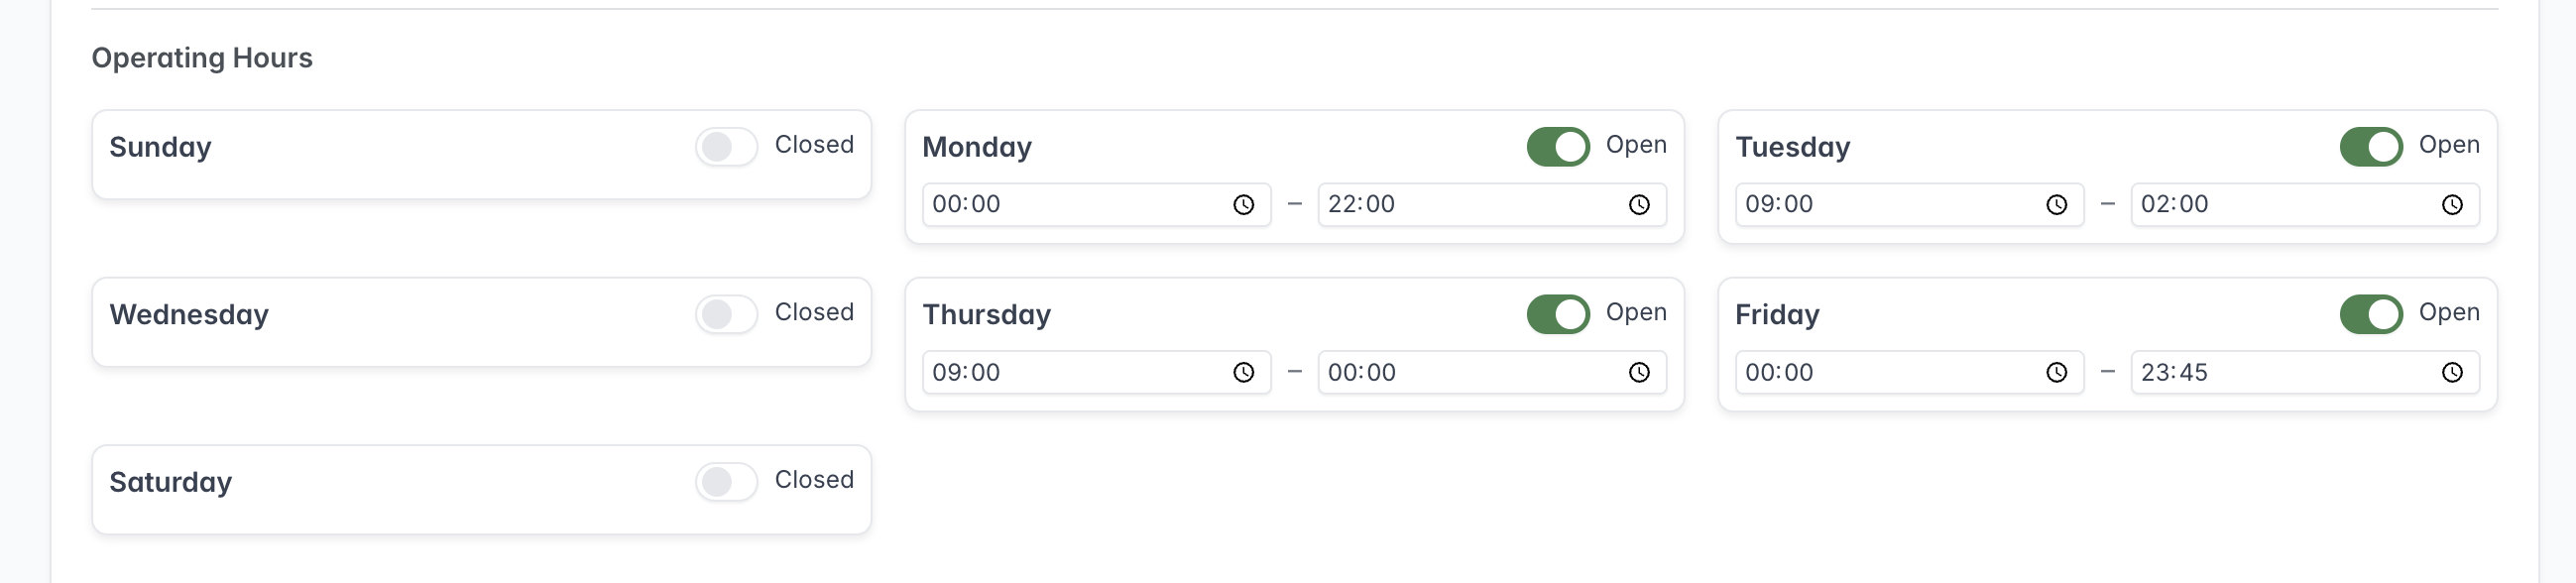
Set the event day to Open and enter the times during which customers can use Order Now.
Order Now allows immediate collection without a future collection slot. The account operating hours, location opening hours, and menu availability should all agree; if one is closed or outside its valid dates, customers may not be able to order. The Close down action disables Order Now, so recheck this setting before the event opens.
4. Add your menu
Open Menus and choose Add menu.
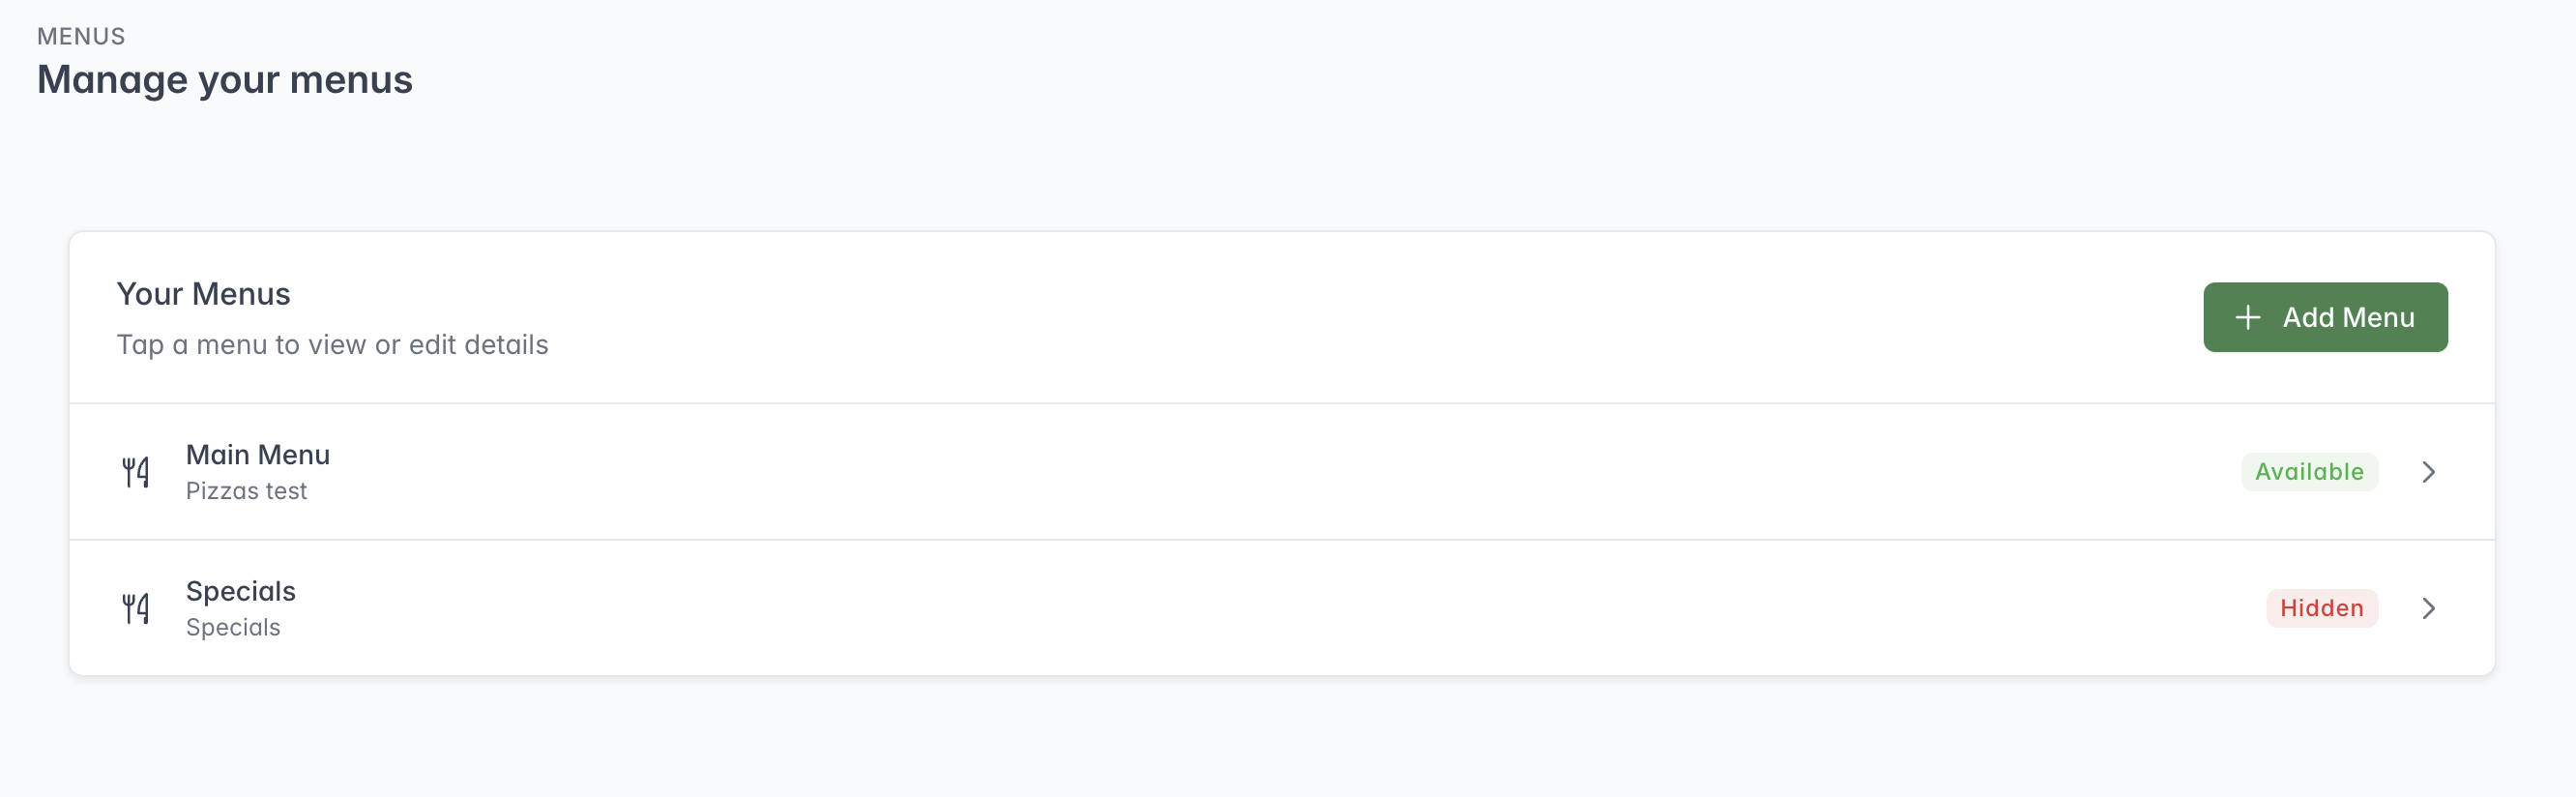
Choose Add Menu to create the menu customers will use for your first event.
- Enter a menu name and description.
- Select the days and hours when it is available.
- Set valid-from and valid-to dates that include the event.
- Link the menu to the event location.
- Save and open the menu.
- Add sections such as Food, Drinks, or Specials.
- Add each item with its name, description, price, tax information, image, dietary details, and any required options.
- Set a slot weight for each item if you are controlling collection-slot capacity.
- Review the section and item order, then confirm that the menu is active.
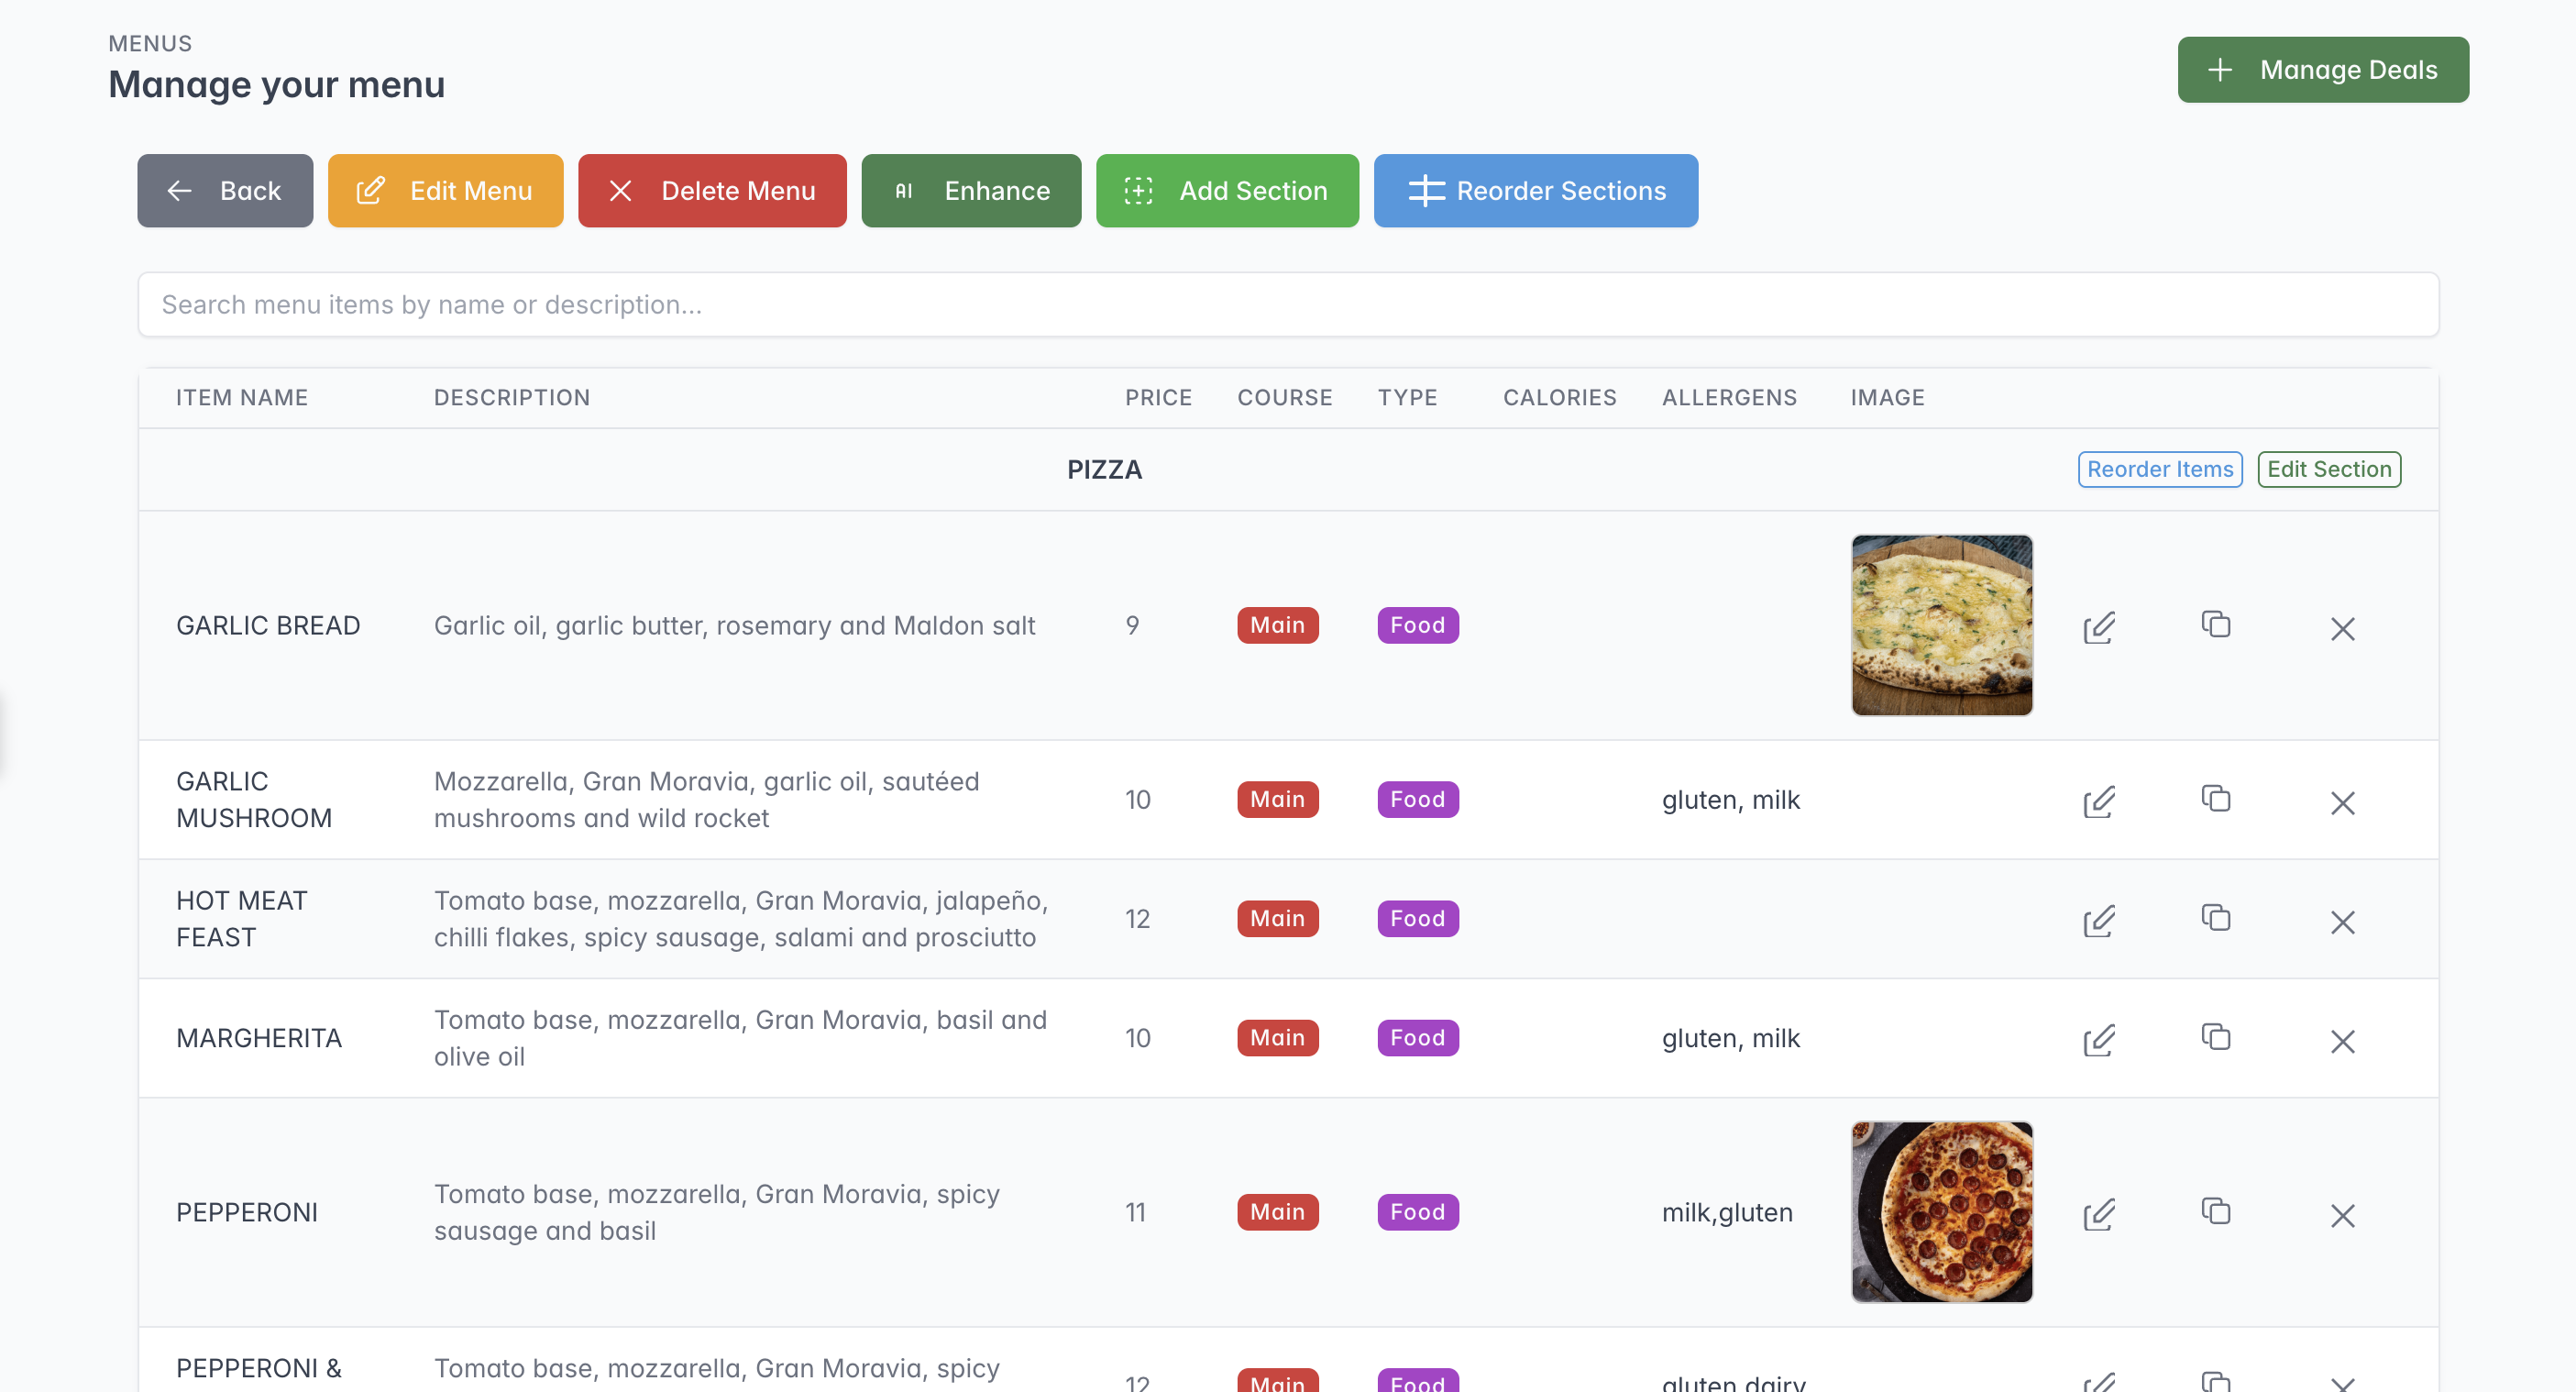
Review your sections and items, then use the controls to edit or reorder anything before customers begin ordering.
See Menus and products for item options, images, dietary information, stock pools, and promotions.
Check that you are ready for online orders
Before sharing the ordering link:
- Open the customer site on a phone and check the logo and colours.
- Confirm that the correct event location is visible or opens through its private link.
- Confirm that the expected collection slots are available, or that Order Now appears during the configured opening hours.
- Check that the menu is visible and its dates and hours cover the event.
- Add several items and options to a test basket.
- Place a test order using the event’s payment setup.
- Confirm that the test order appears in Live Orders with the correct location, collection time, items, and total.
Ready to launch
Once the test order reaches Live Orders correctly, you are ready to share the ordering link or event QR code and begin taking online orders.