
Appearance
Menus and products
Last reviewed: 15 July 2026 · Beat The Queue version: 2.6.0 (11 July 2026)
Create food, drinks, and other products customers can buy, organise them into sections, and add options and promotions.
Feature availability
The pages you see depend on your account features, connected equipment, and payment setup. Features marked Pro or described as account-controlled may not be included in every plan.
Menu list
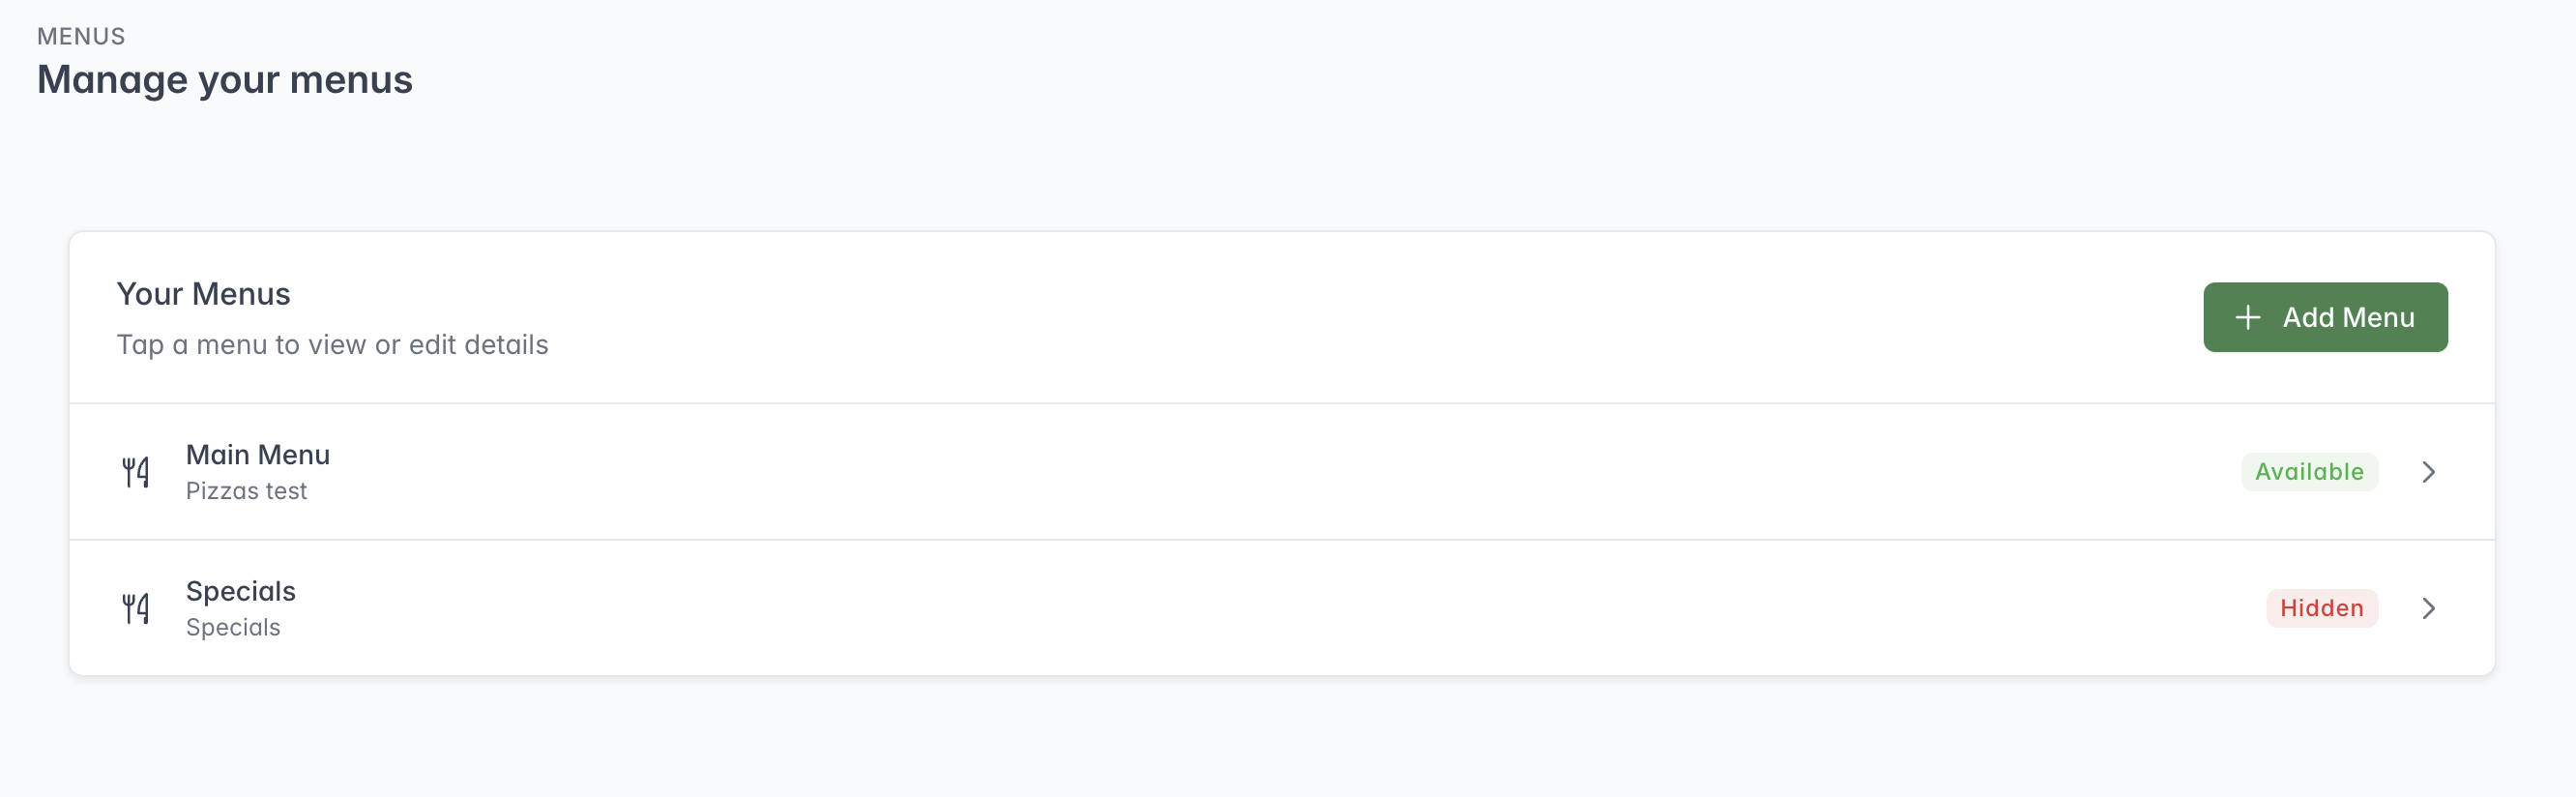
The menu list shows which menus are available to customers and which are hidden.
Each menu has a name, description, availability dates, operating days and hours, and a status.
To create an entry:
- Choose Add menu.
- Enter a name and description.
- Set valid-from and valid-to dates.
- Optionally upload a menu file for processing.
- Save, then open the entry to review its sections and items.
When editing, a menu can be linked to selected locations. Uploading a replacement menu file warns that current menu items will be replaced, so export or record any information that must be retained before proceeding.
Sections and item order
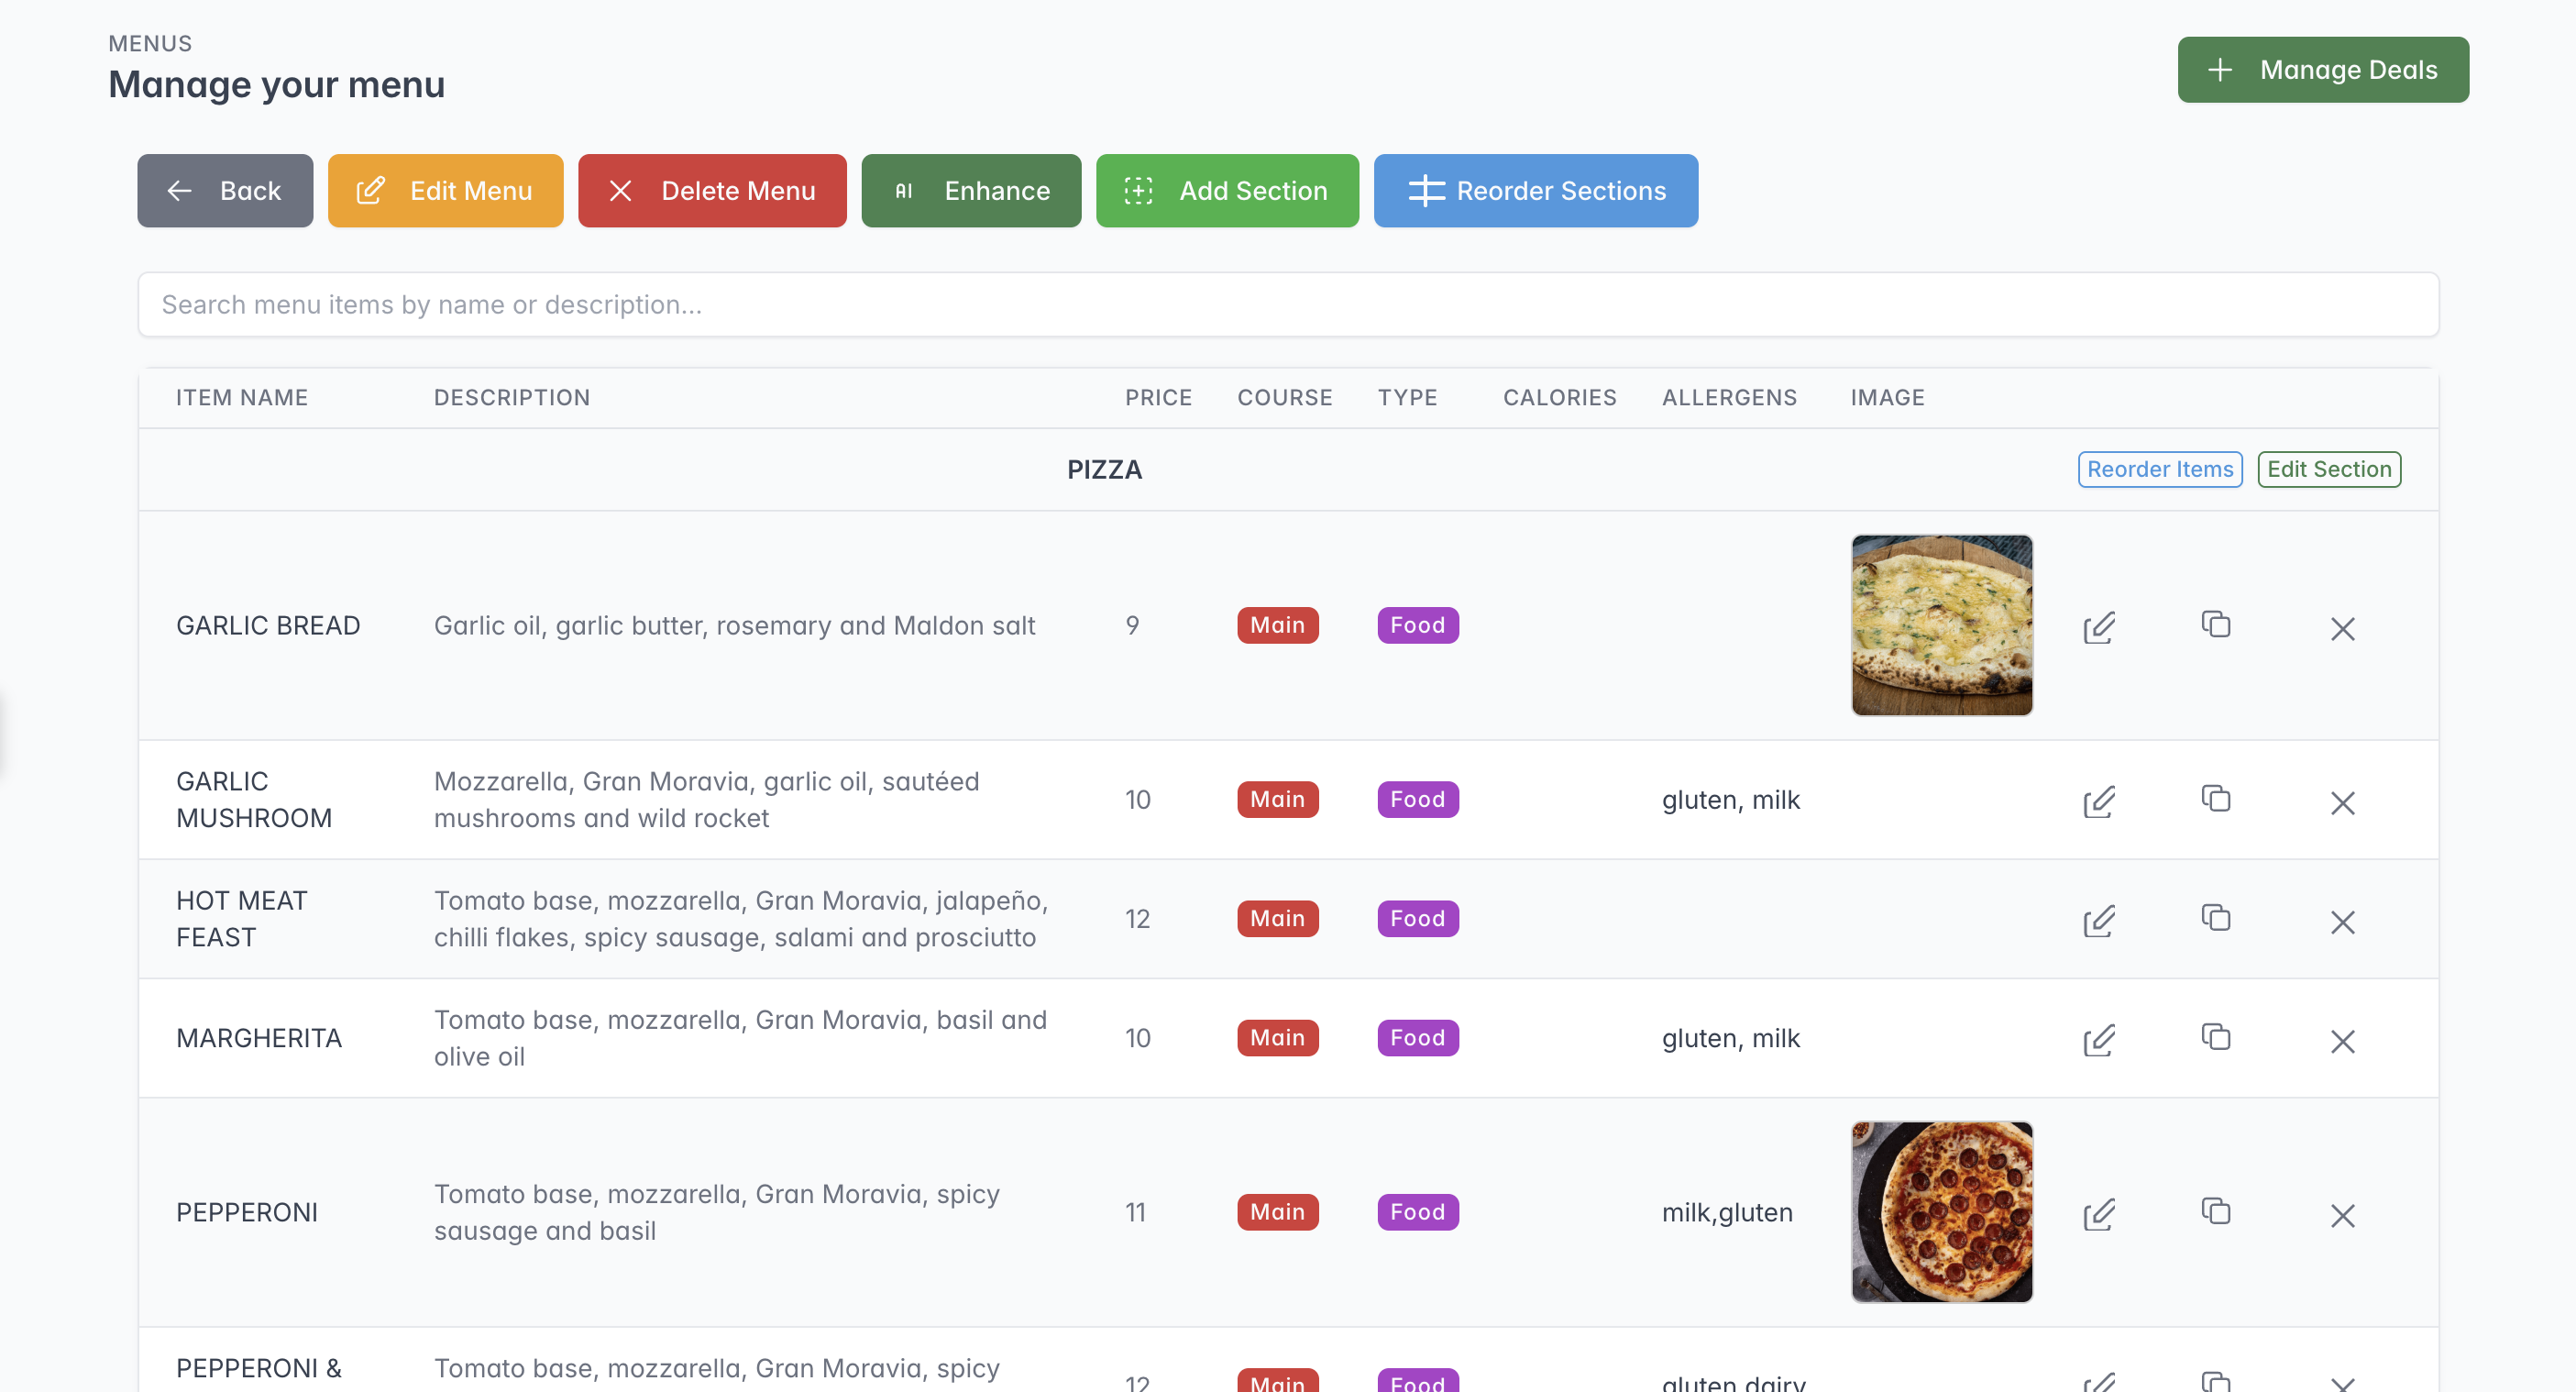
Each section groups its items and provides controls for editing and reordering the menu.
Inside a menu, staff can:
- add, rename, and delete sections;
- add, edit, copy, move, and delete items;
- search items by name or description;
- reorder sections; and
- reorder items within a section.
The customer ordering app follows this display order.
You can queue a menu for automatic AI enhancement. We will use real world menu data to attempt to fill in allergens and dietary information. Return after a few minutes and review every change before publishing the result to customers.
Food and drink item details
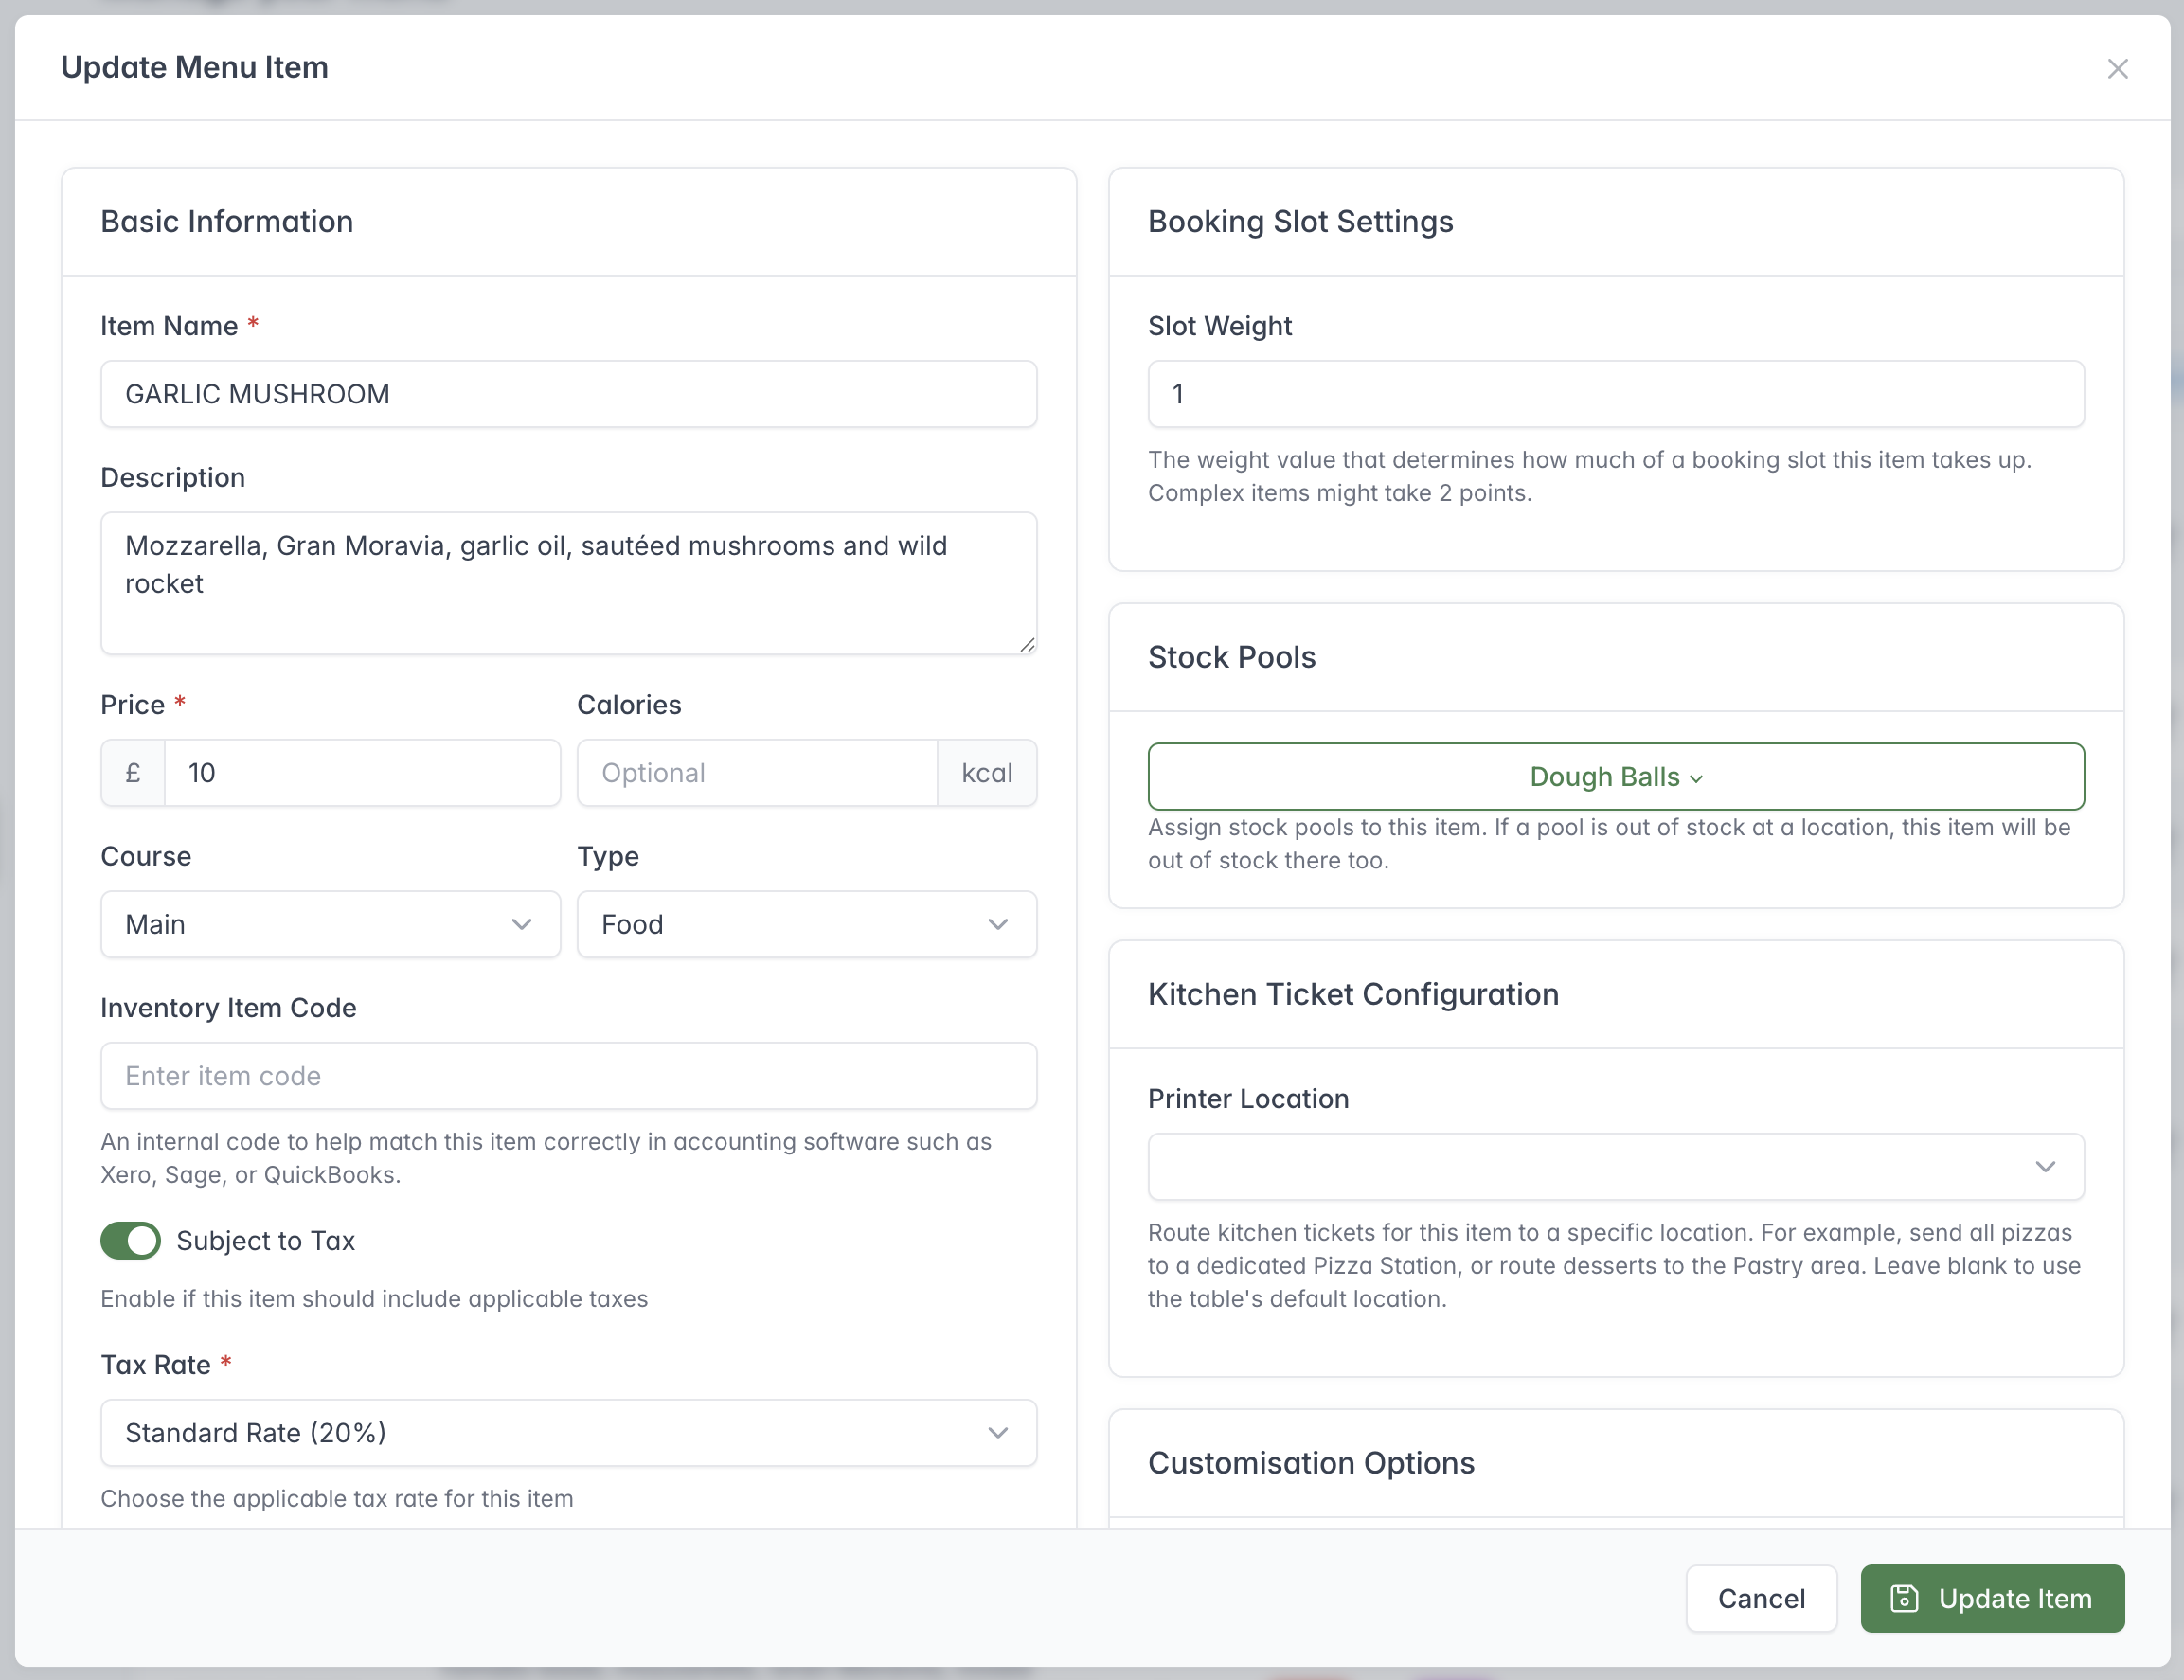
Use Basic Information for the customer-facing item details, then configure fulfilment settings such as slot weight, stock pools and kitchen routing where required.
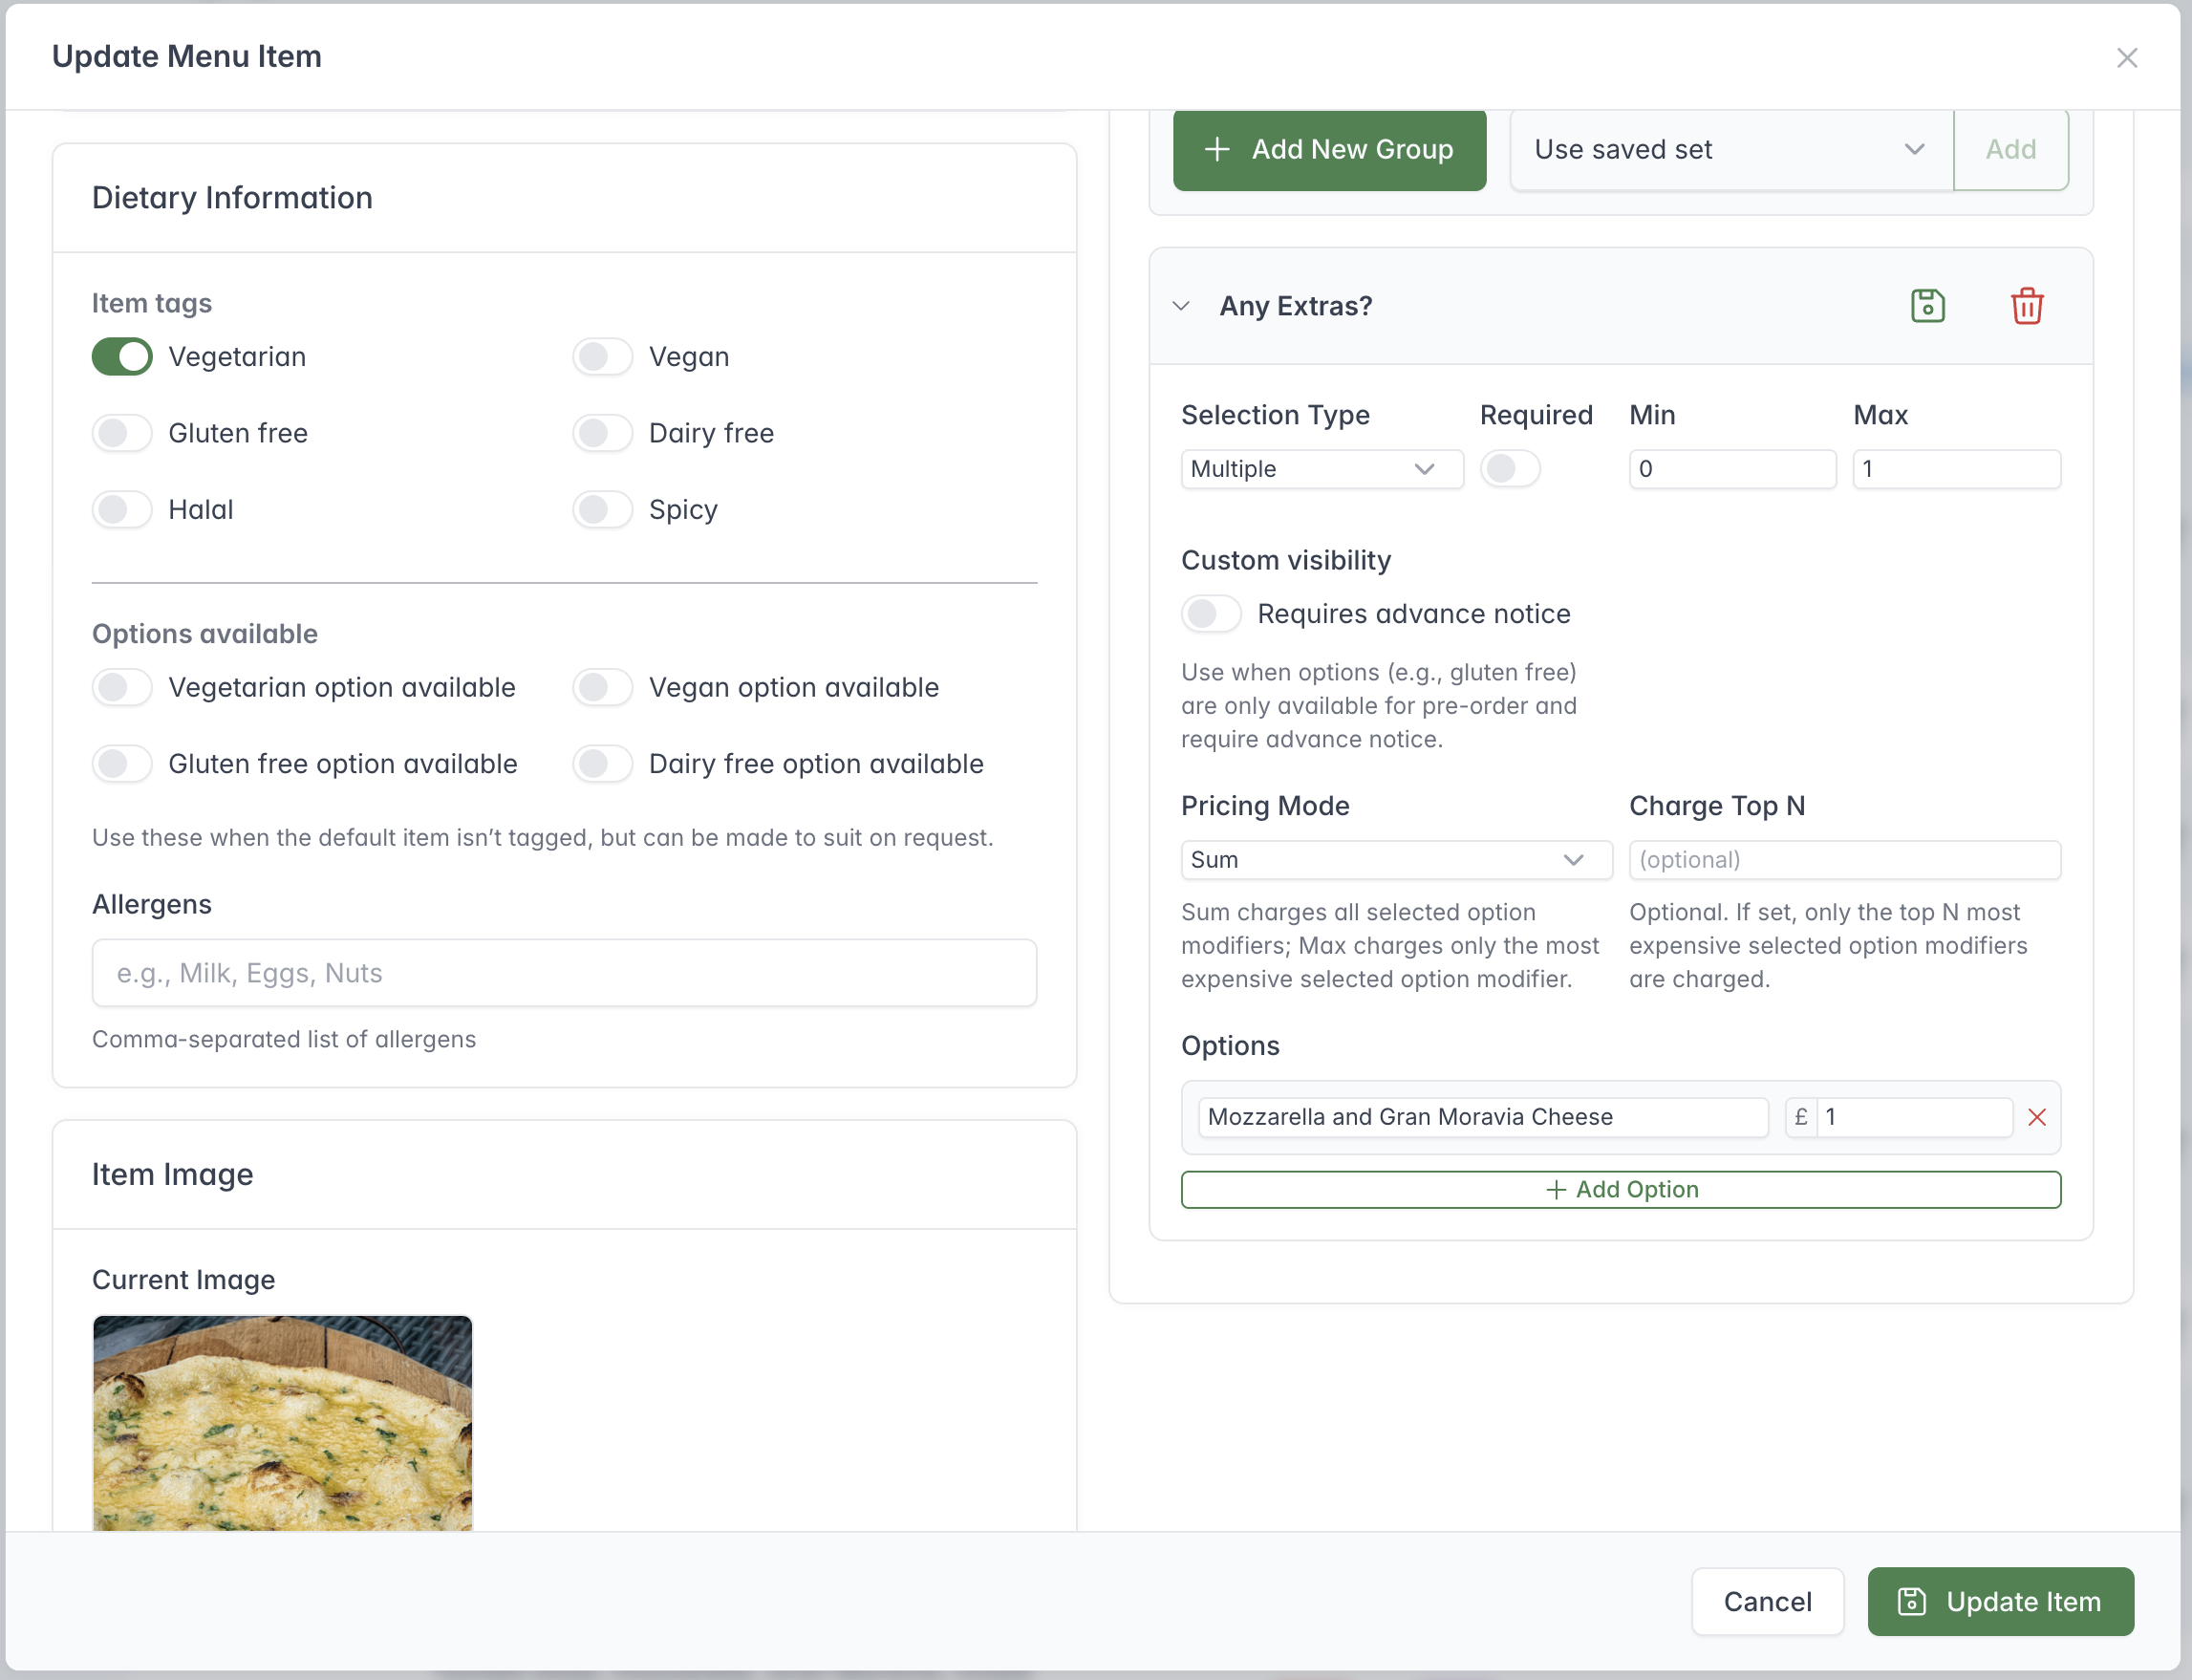
Add accurate dietary information and allergens, then check the item image before saving.
A menu item can include:
- item name and description;
- price and calories;
- course: Starter, Main, Dessert, or Drink; (This is for internal use only and has no effect to customers)
- type: Food, Alcohol, or Soft Drink; (This is for internal use only and has no effect to customers)
- internal inventory item code;
- whether it is subject to tax and its tax rate;
- dietary labels: Vegetarian, Vegan, Gluten free, Dairy free, Halal, and Spicy;
- labels showing that vegetarian, vegan, gluten-free, or dairy-free options can be requested;
- a comma-separated allergen list;
- a menu item image;
- collection-slot weight;
- one or more stock-pool assignments;
- a printer location for kitchen routing; and
- customisation option groups.
Dietary labels and allergen text are shown to the customer.
The inventory item code helps align products with Xero, QuickBooks, Sage, or another inventory process. It is not intended as customer-facing copy.
Images
Item images can be uploaded, previewed, repositioned, zoomed, and cropped. Large images are prepared as square images up to 1200 × 1200. Use clear, well-lit images with the subject centred and leave enough space for a square crop.
Customisation options
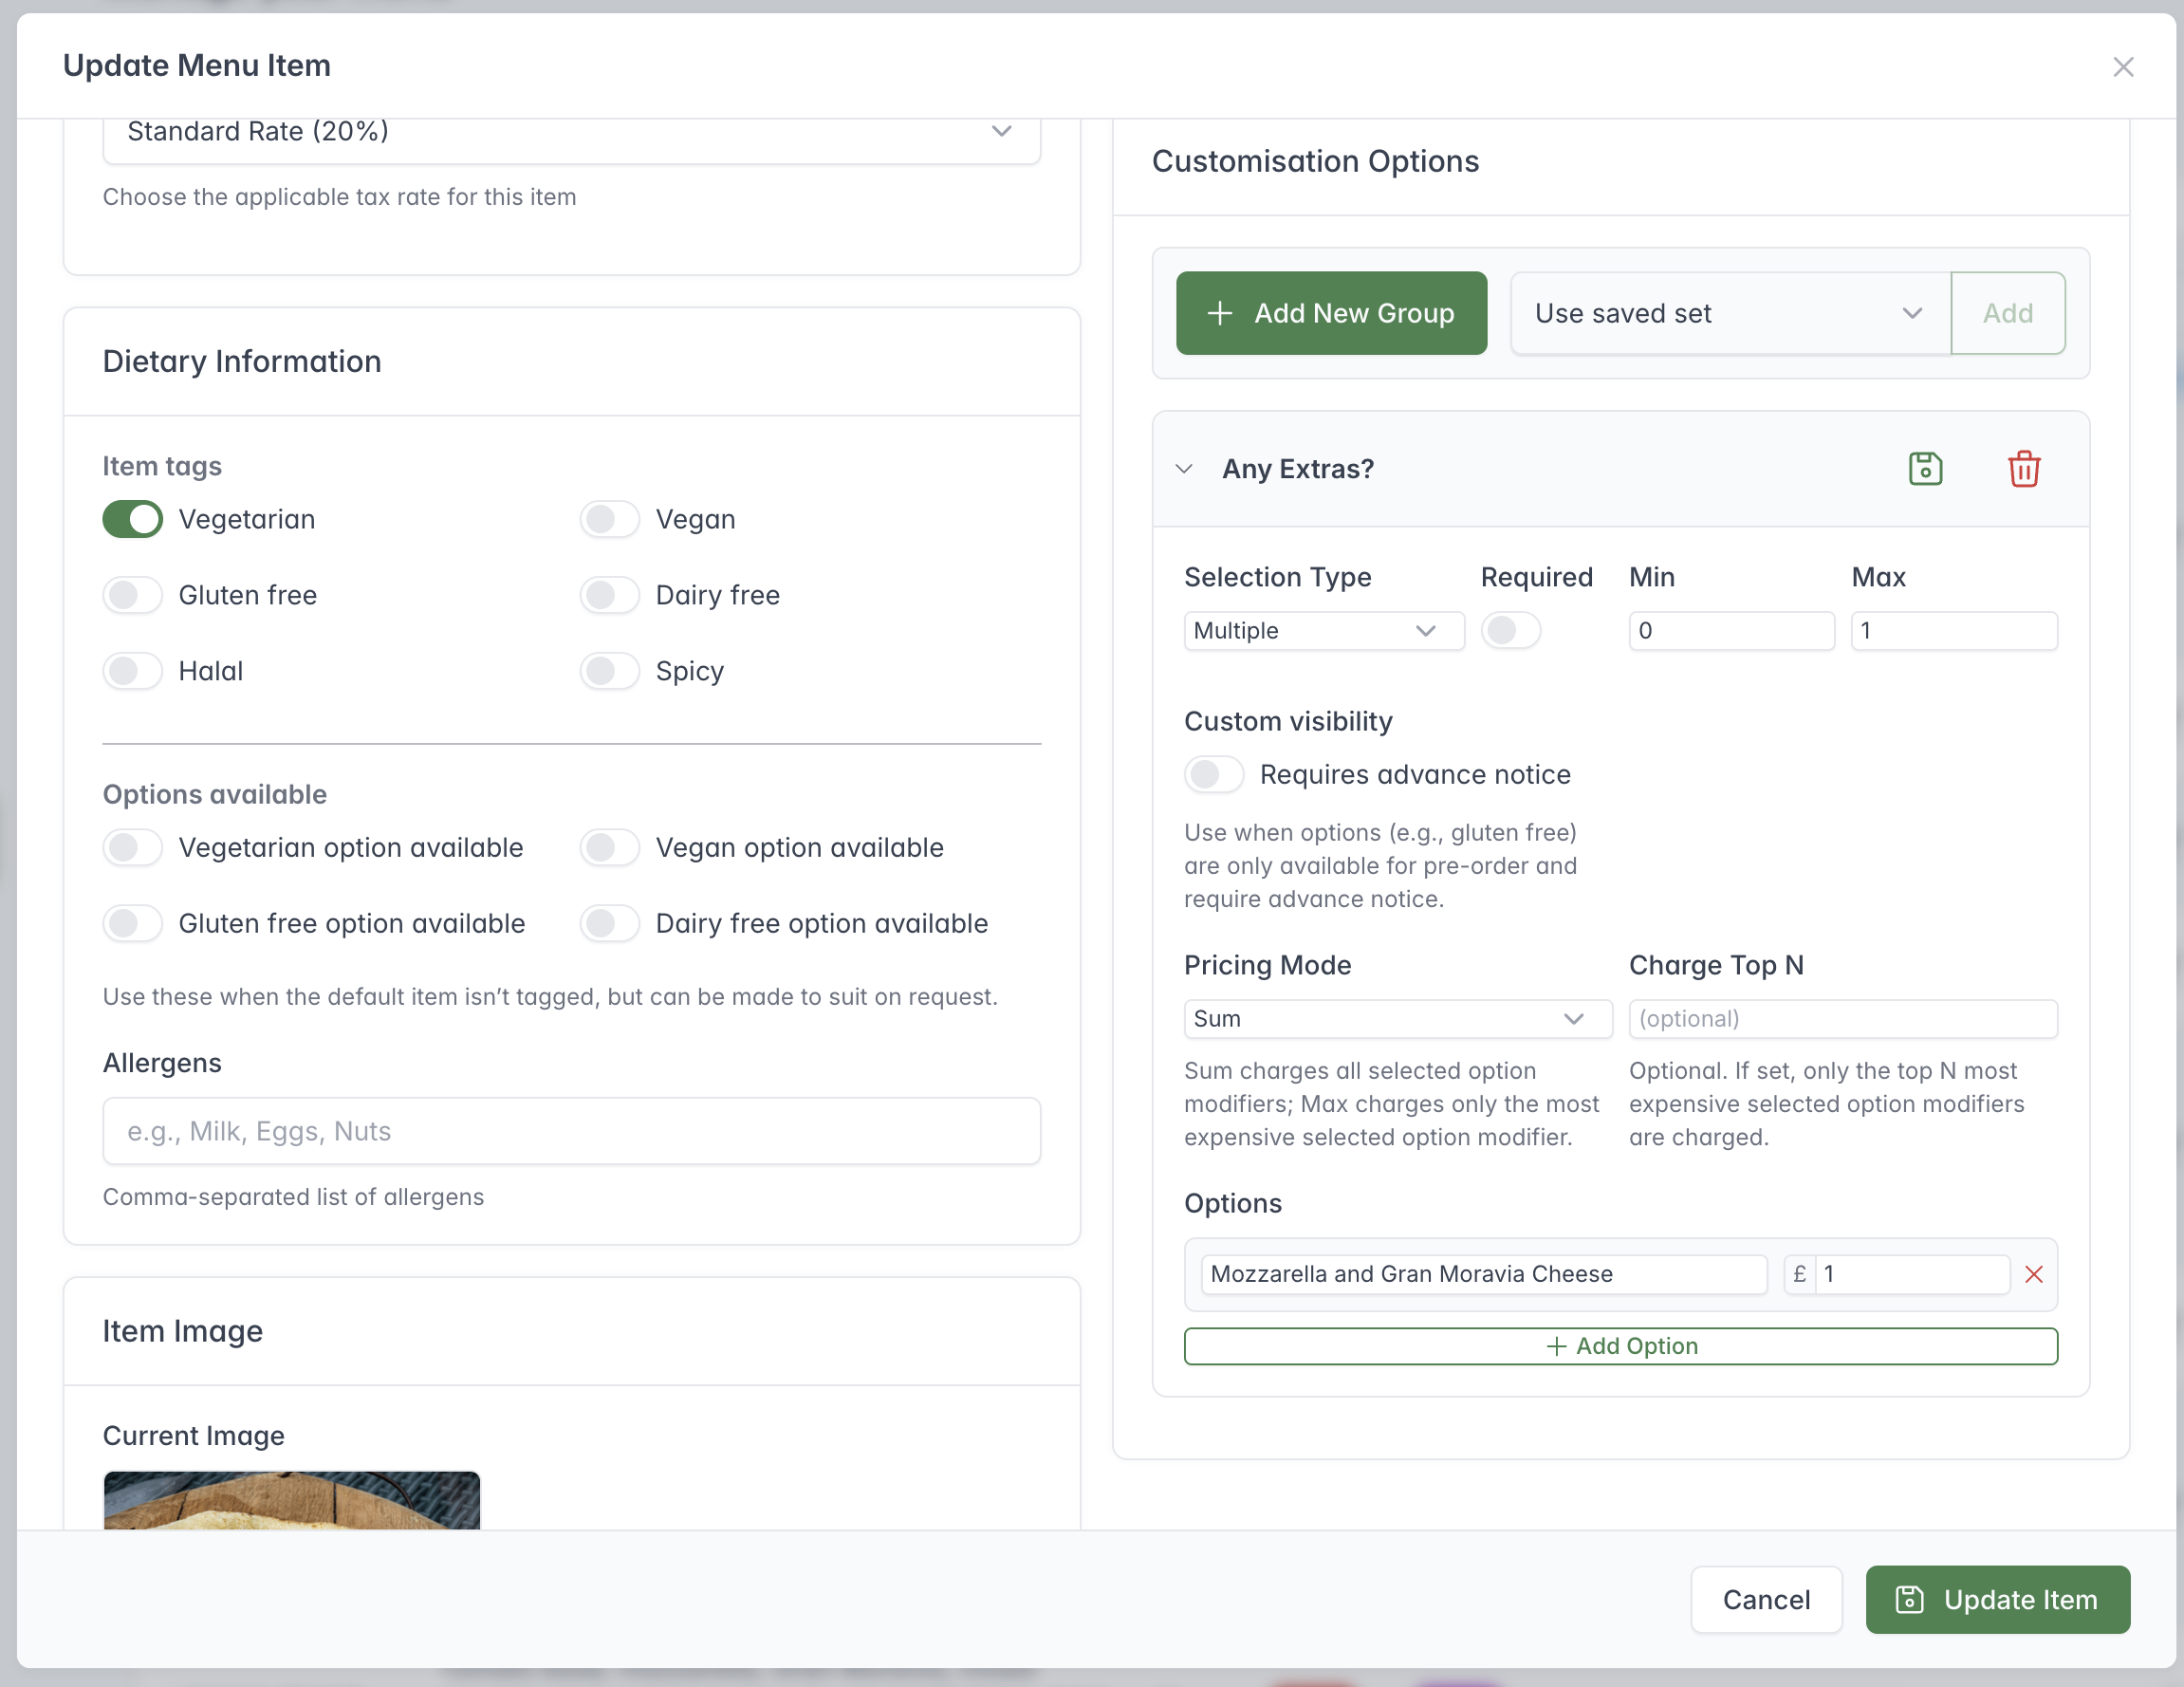
Create a new option group or attach a saved set, then define its selection rules and any extra charges.
Option groups represent choices such as size, toppings, extras, add-ons, or upgrades.
For each group, set:
- a group name;
- single or multiple selection;
- whether a choice is required;
- minimum and maximum selections; and
- the choices and any extra prices.
Option Sets
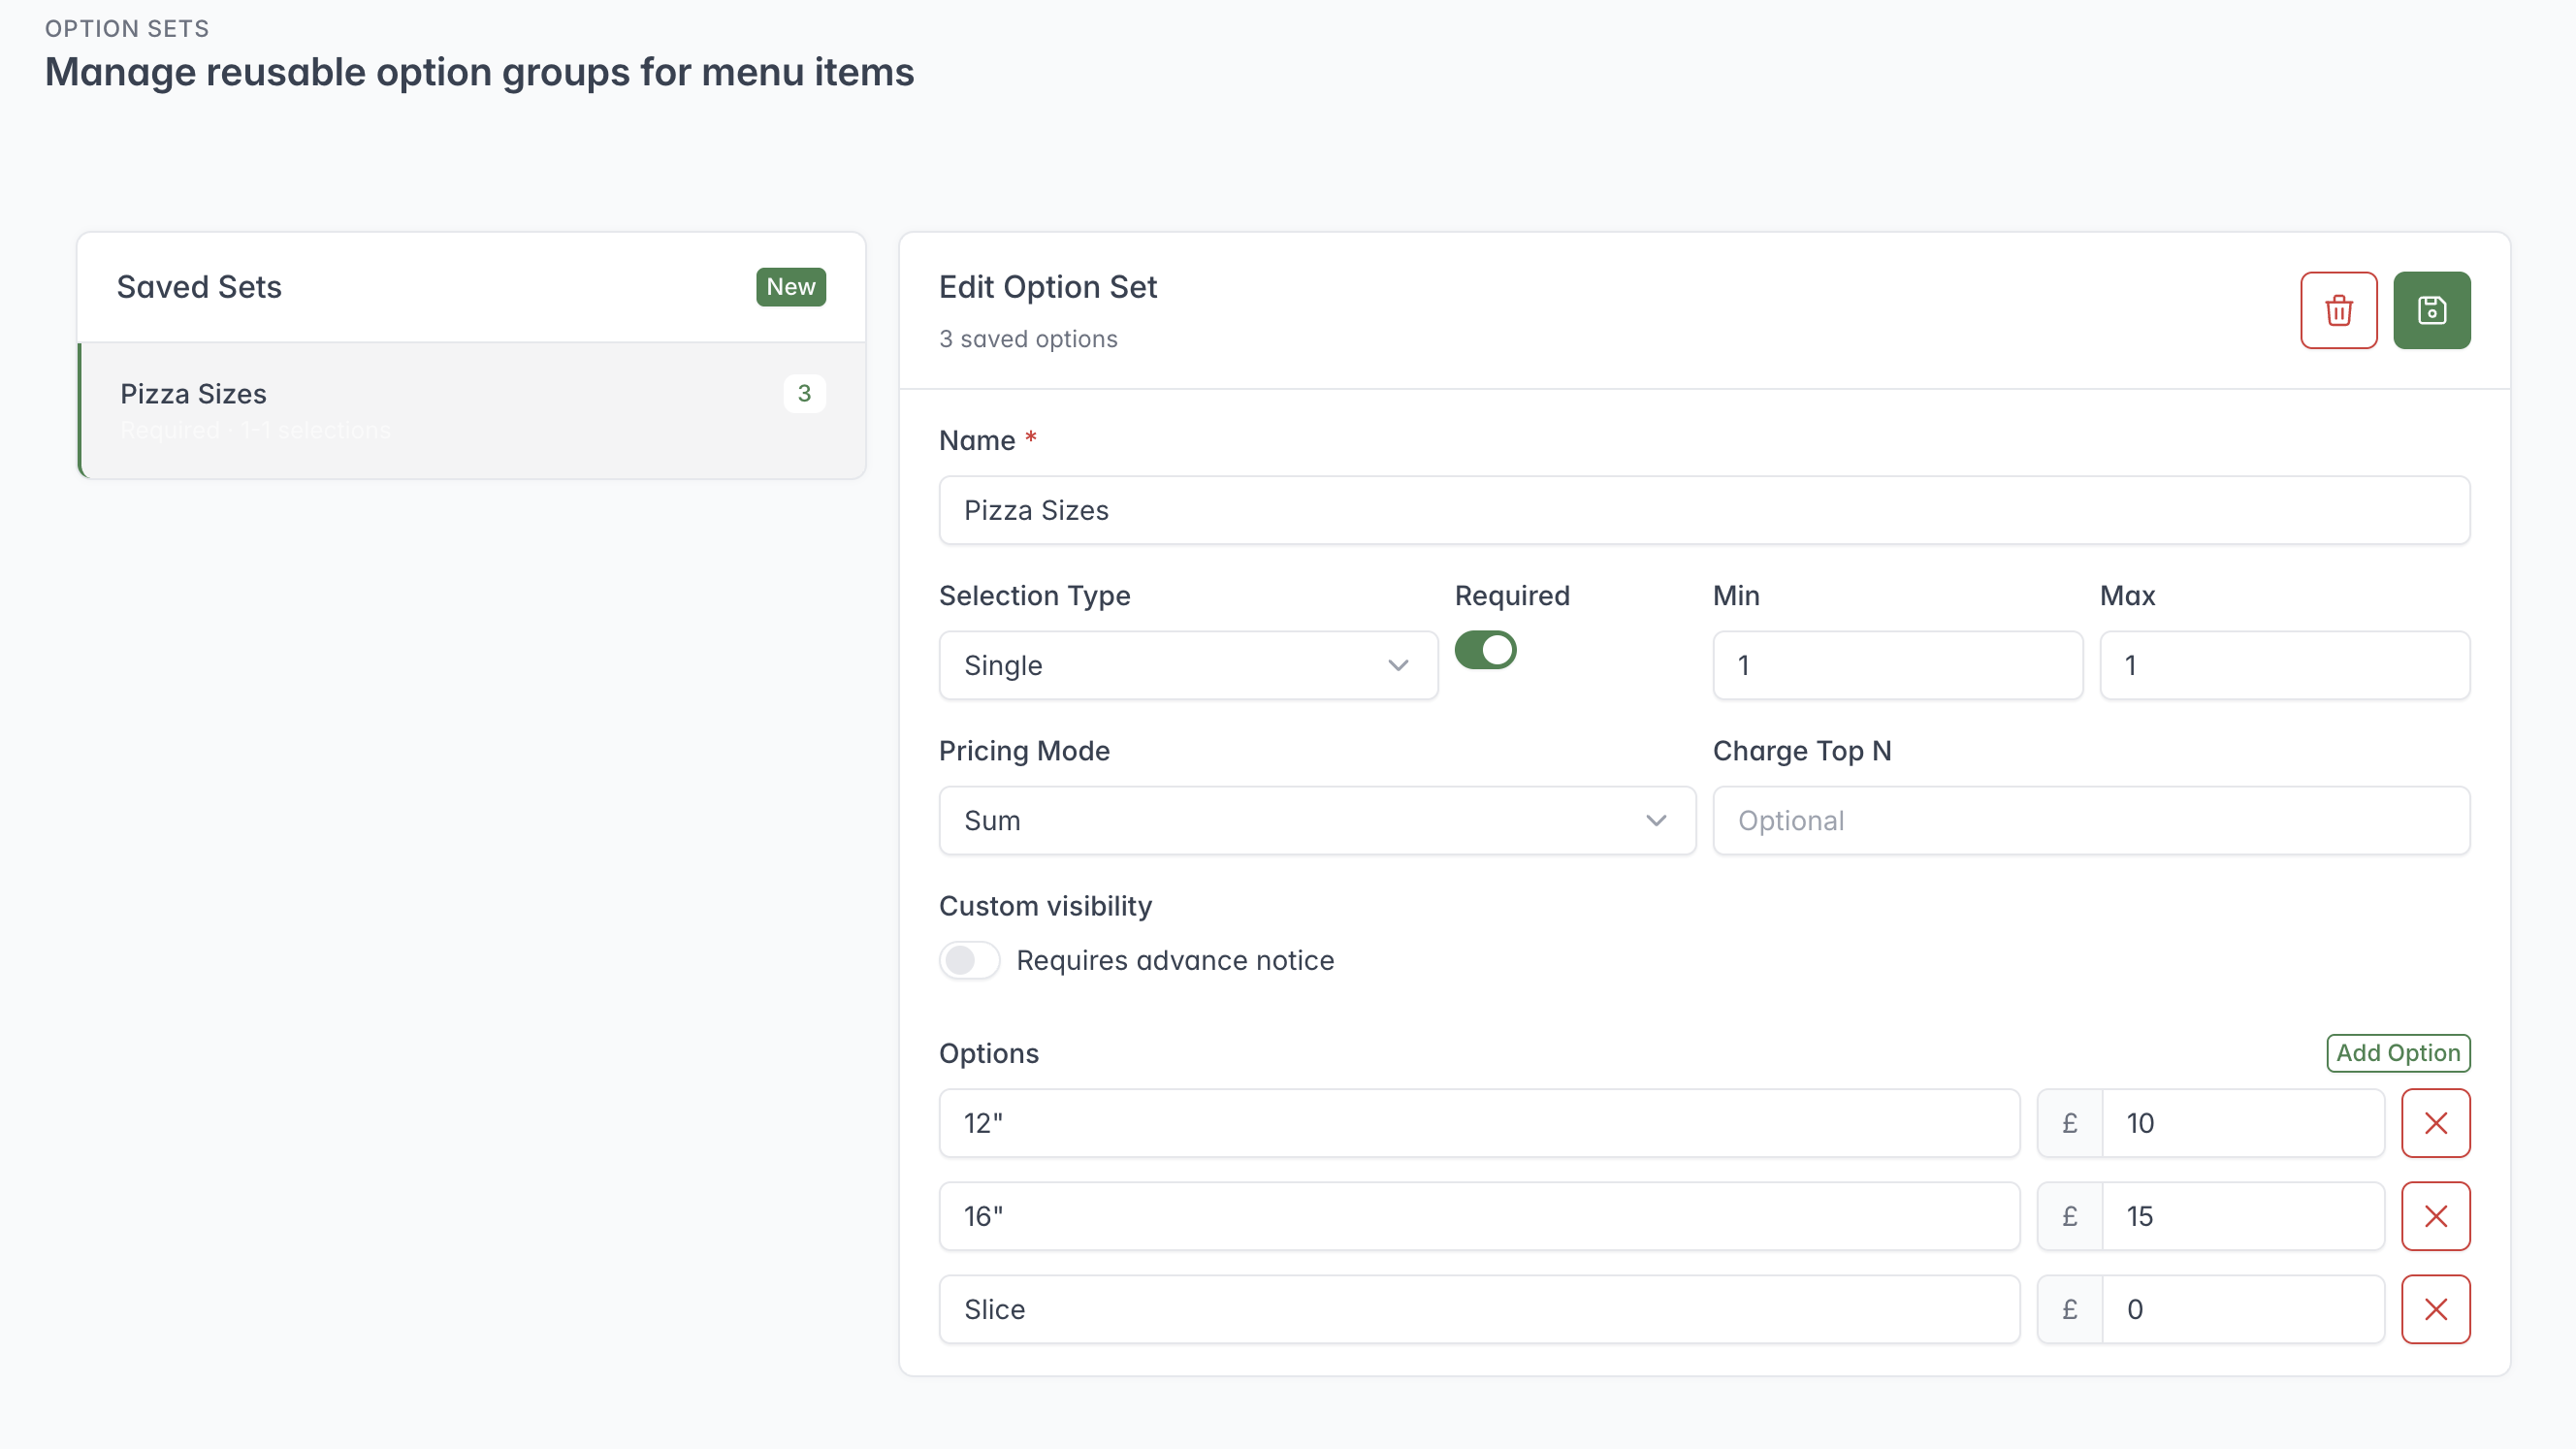
Saved Option Sets let you maintain a standard group of choices and reuse it across menu items.
Option Sets are reusable collections of choices. Create a named set once, then attach it to multiple items. Editing a set is useful when several products share the same standard choices.
Deals and promotions
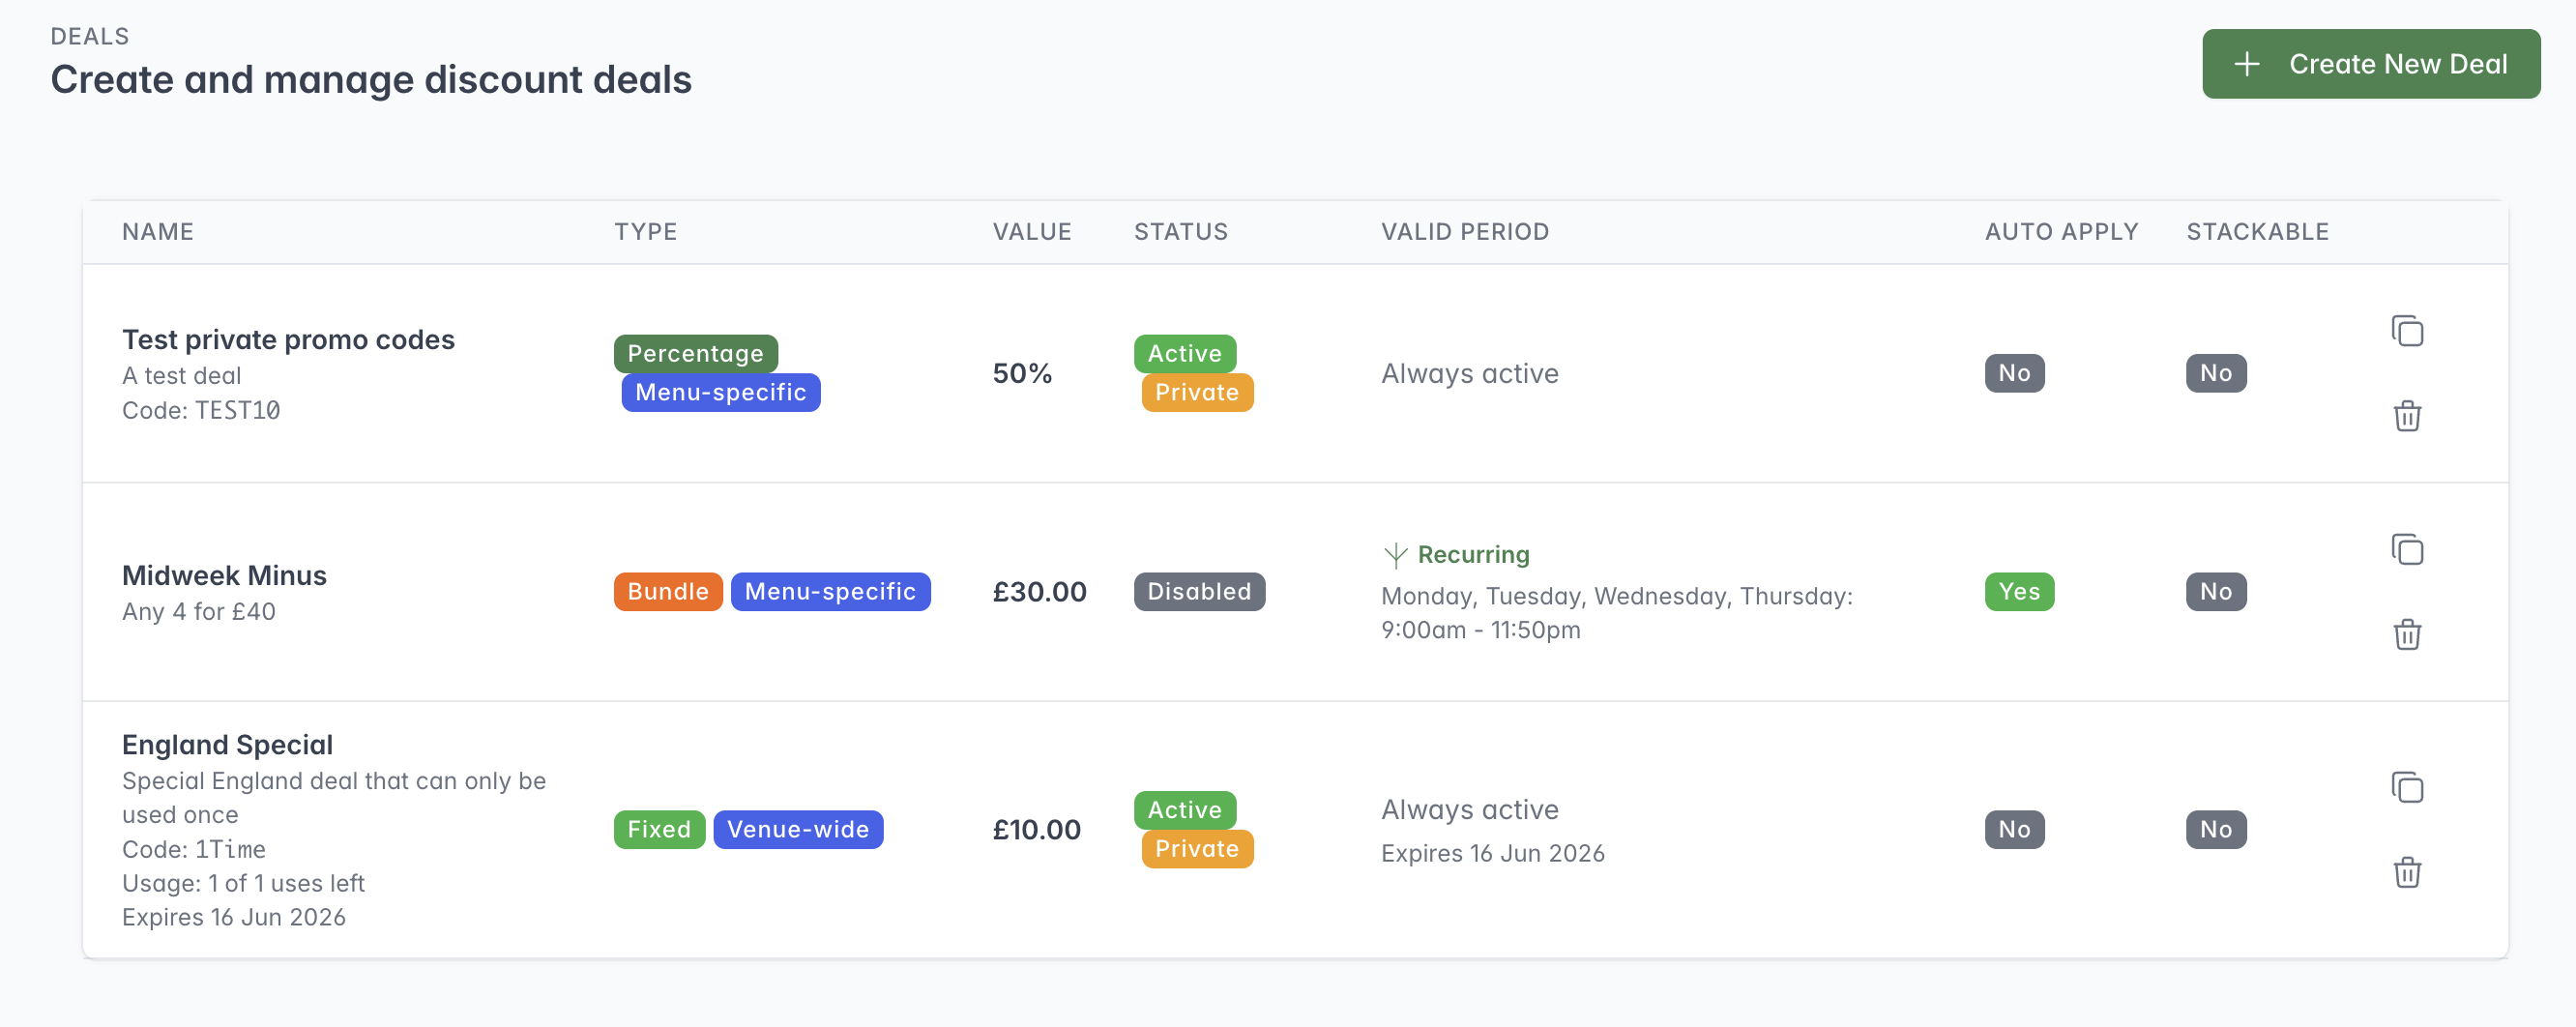
The deals list summarises how each promotion works and whether it is currently active.
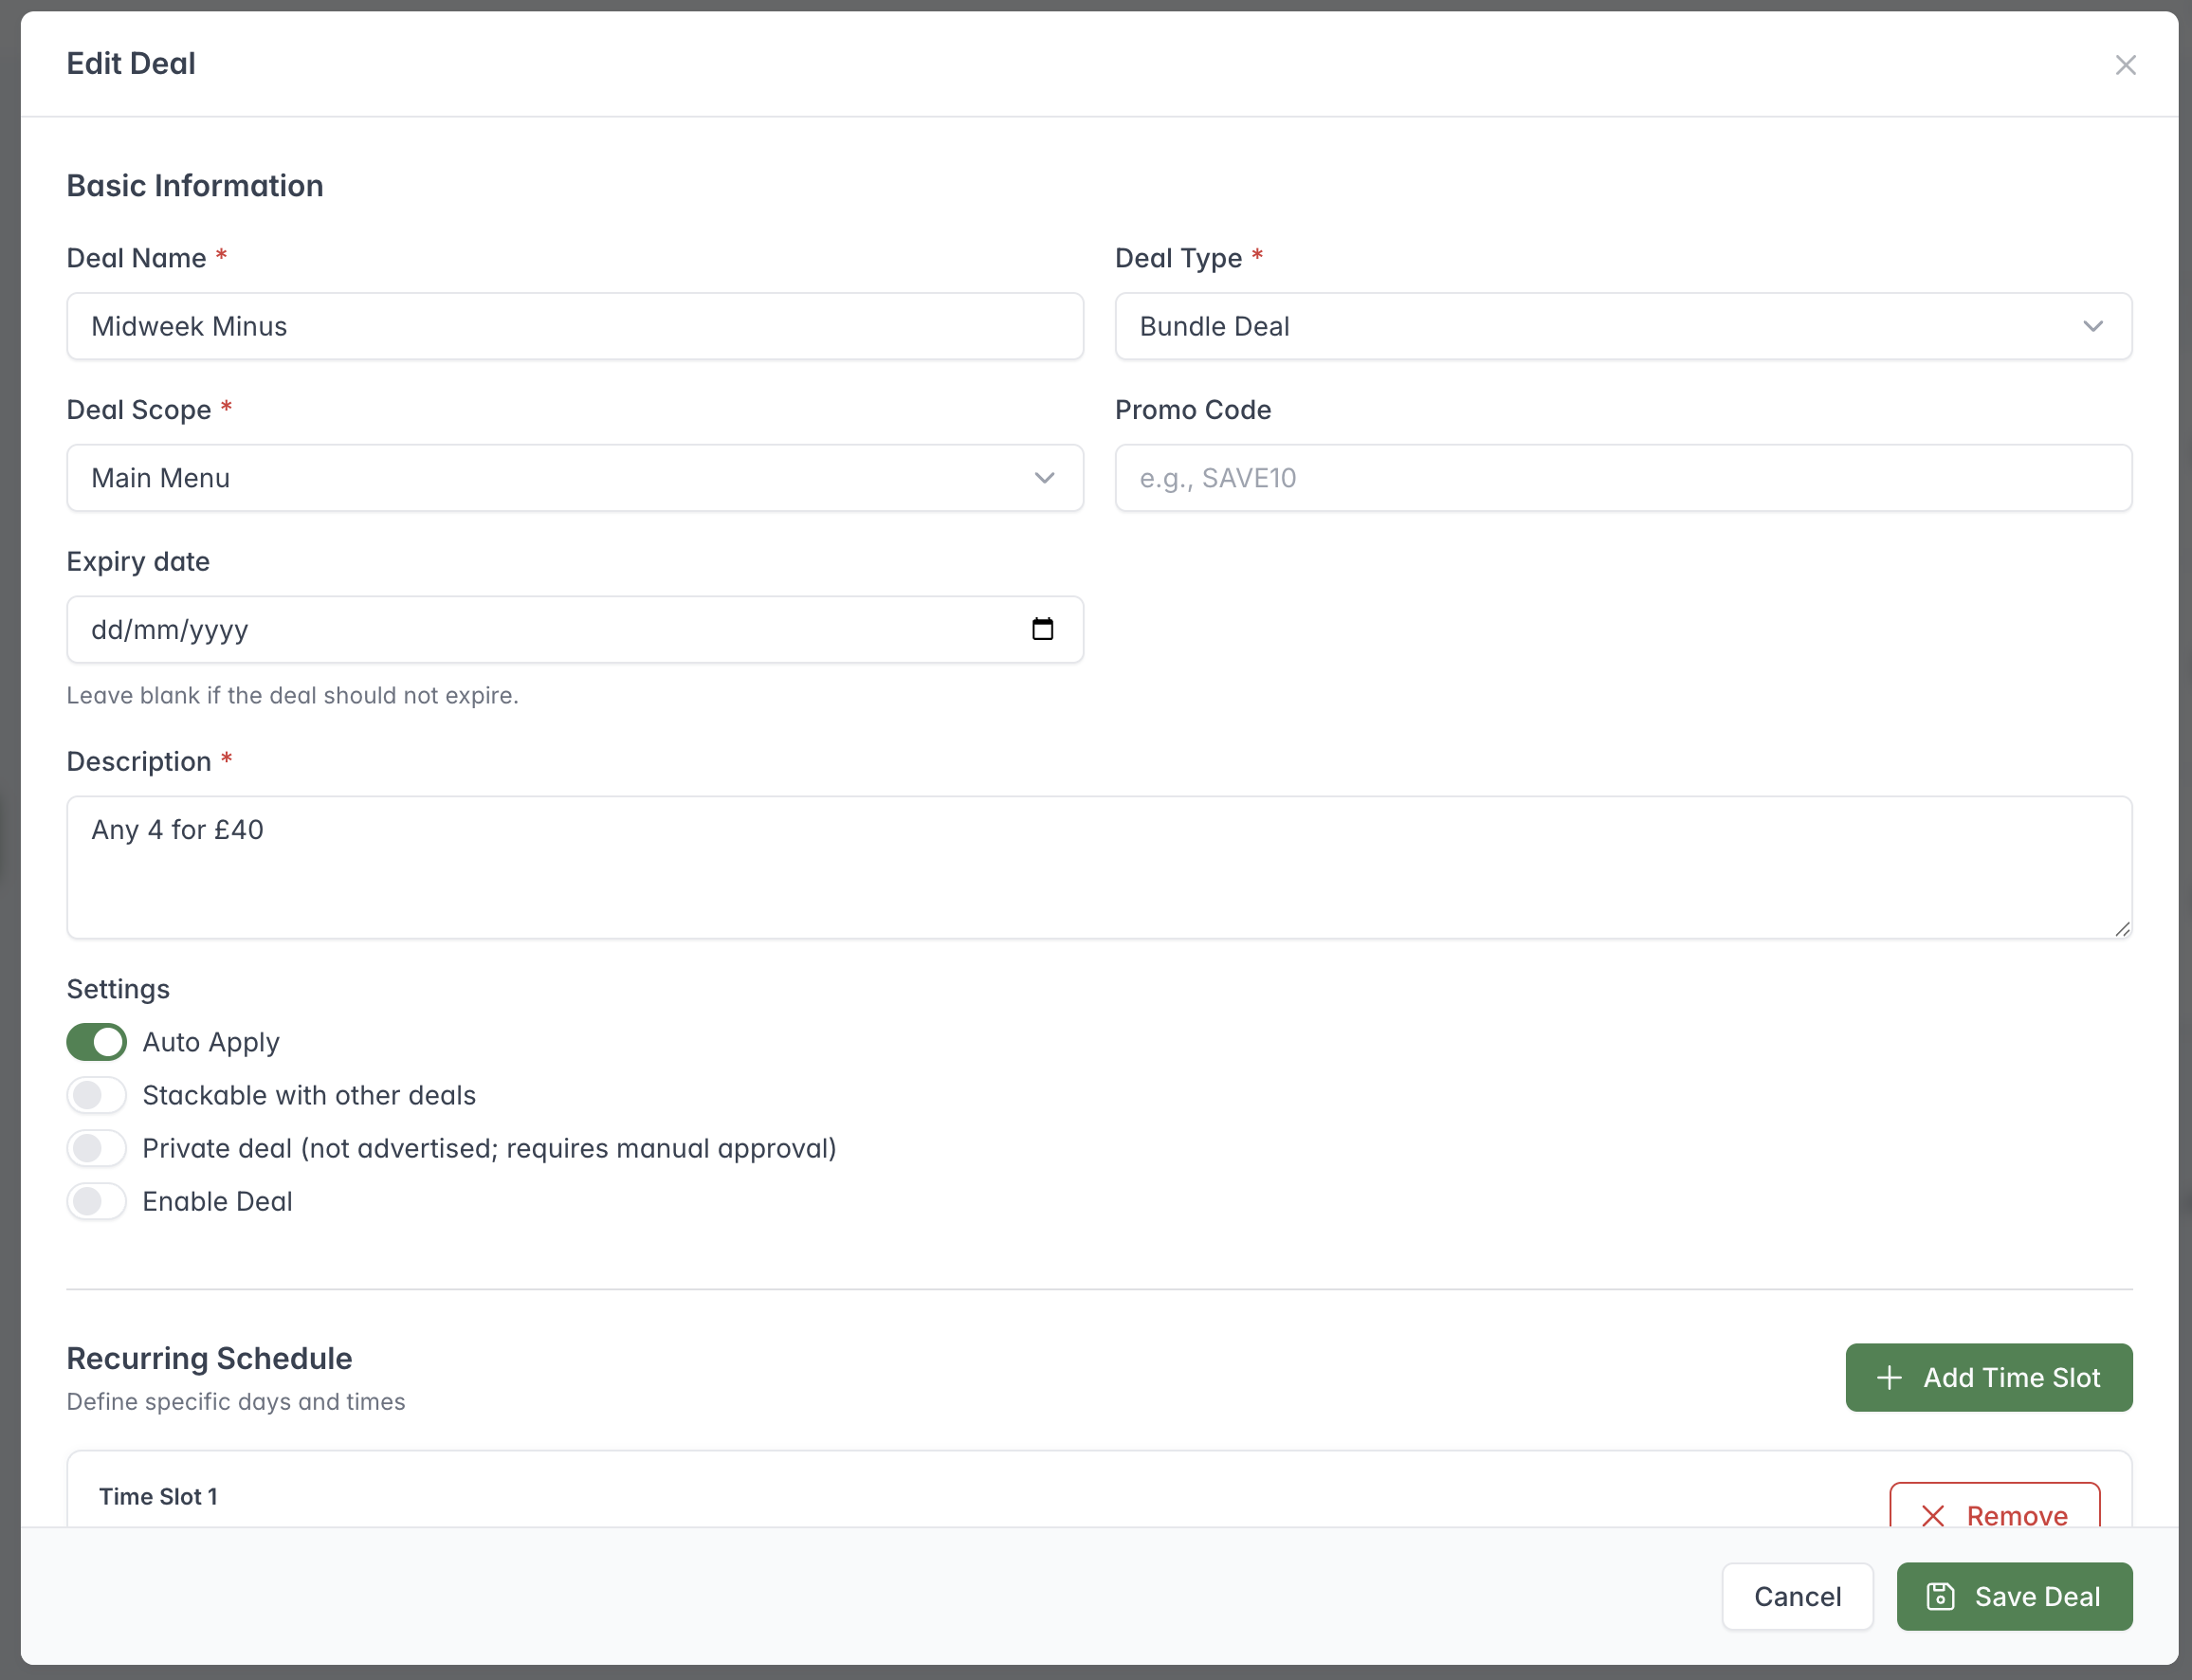
Define the deal and its scope, then use a recurring schedule when it should only apply on particular days or times.
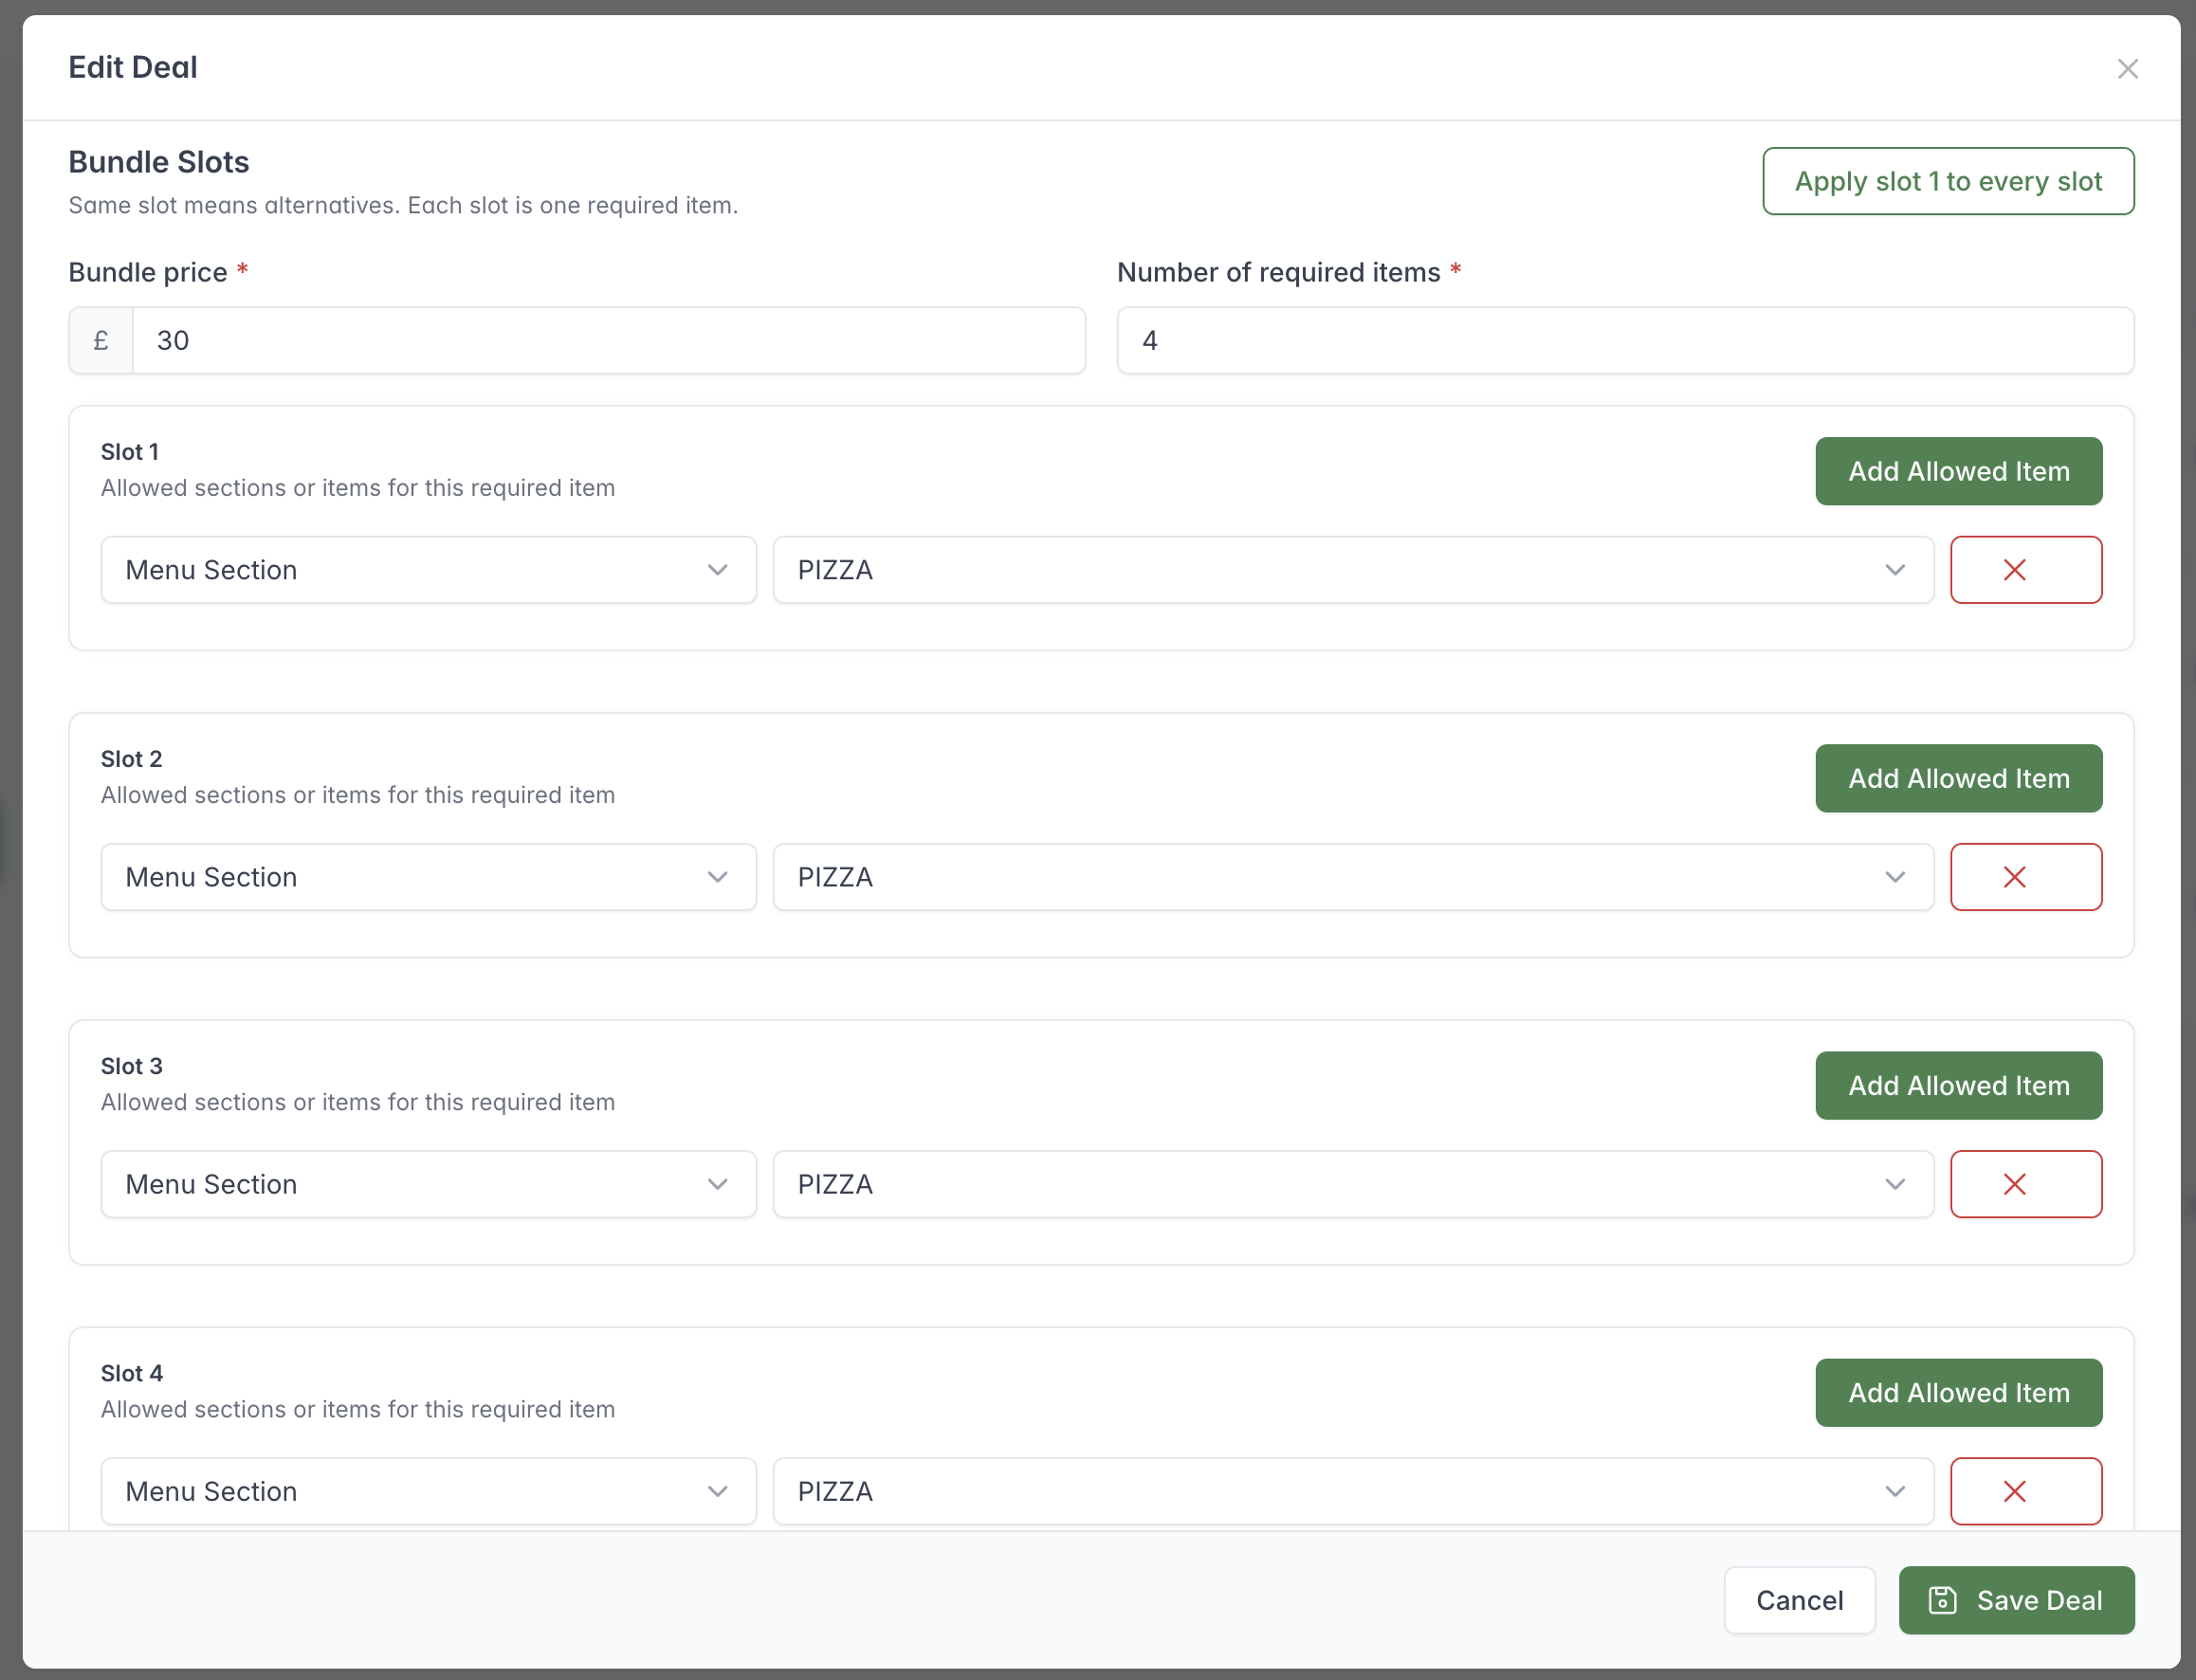
Each bundle slot represents one required choice; select which menu sections or individual items customers may use for that slot.
Open a menu and choose Manage Deals. Deals can be account-wide or tied to a menu. Available deal types and settings include:
- percentage discounts;
- buy-one-get-one offers;
- fixed-price bundles;
- promo codes;
- an expiry date;
- maximum and remaining code uses;
- automatic application;
- stacking with other deals;
- private deals that are not advertised and require manual approval;
- enabled or disabled status;
- recurring day and time schedules;
- targets such as an item, section, whole order, or tag; and
- conditions such as minimum spend, minimum item count, required item, required section, day of week, time range, or promo code.
A promo code disables automatic application. If no recurring schedule is set, an enabled deal is treated as available at all times, subject to its other conditions and expiry.
Bundles are built from required slots. Each slot represents one required part of the bundle and can allow alternative sections or items. Set the bundle price and the number of required items, then define what is allowed in each slot.
Always test a new promotion with a representative basket before advertising it. Pay particular attention to stacking, auto-apply, expiry, location or menu scope, and usage limits.